
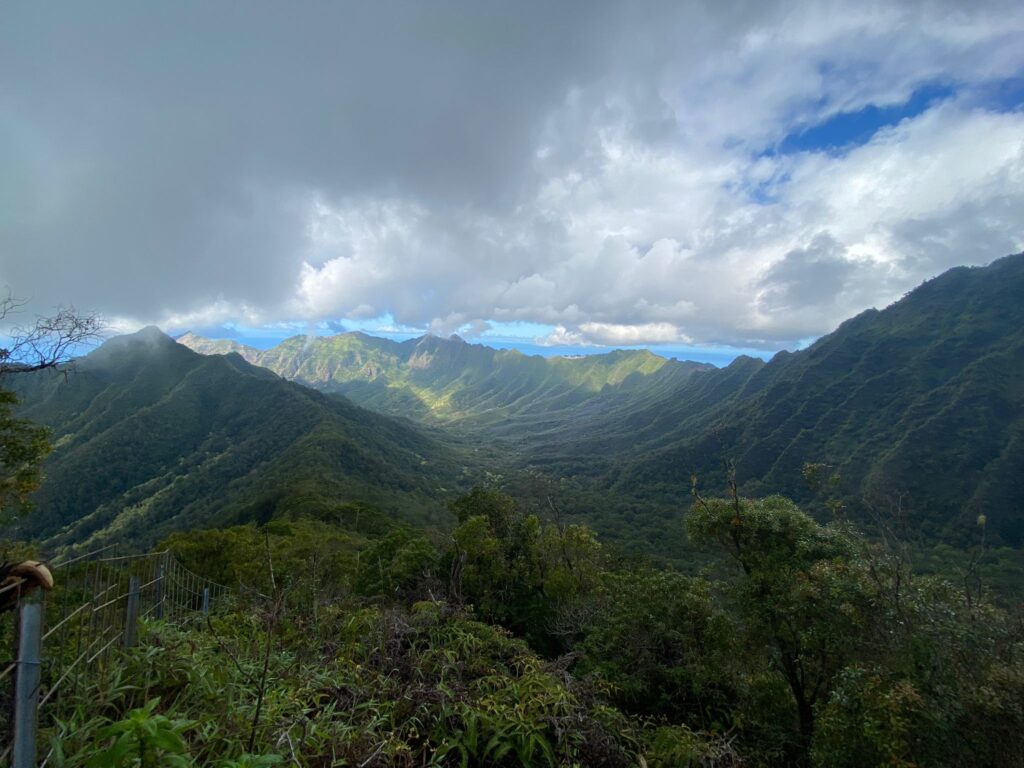
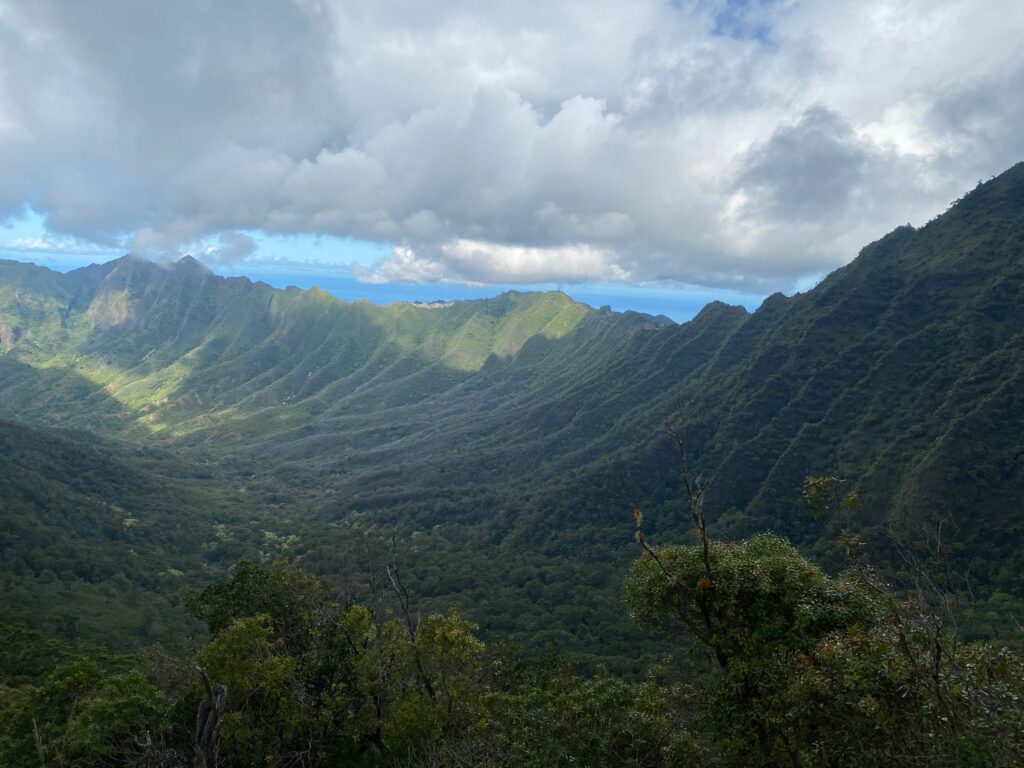
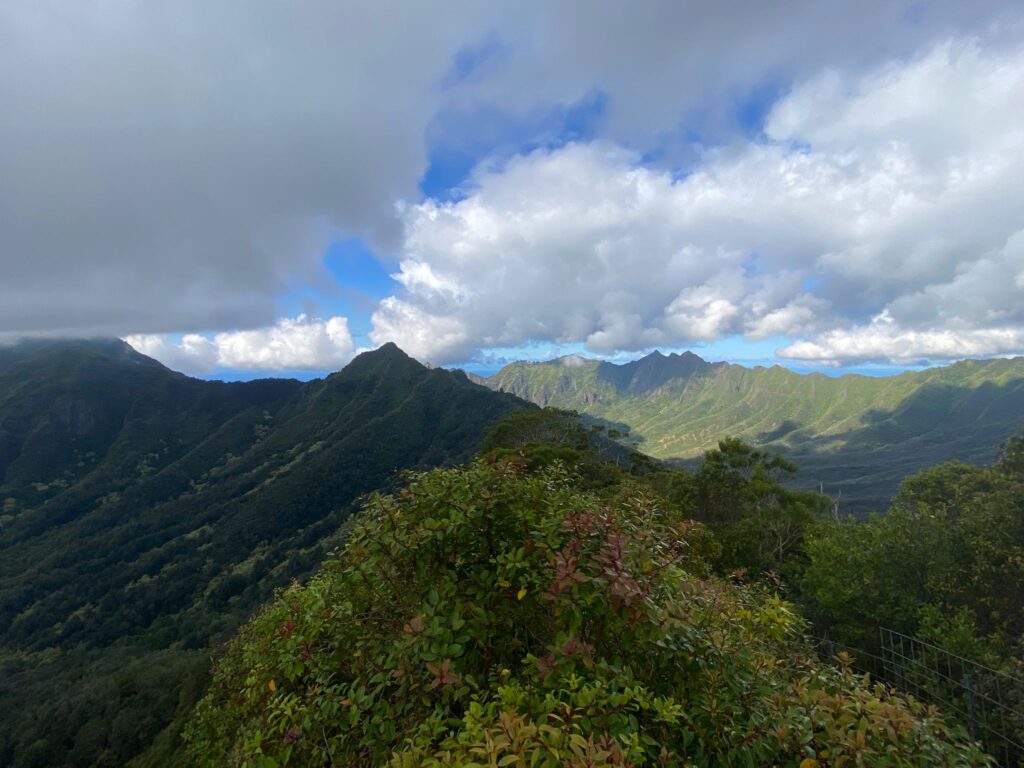
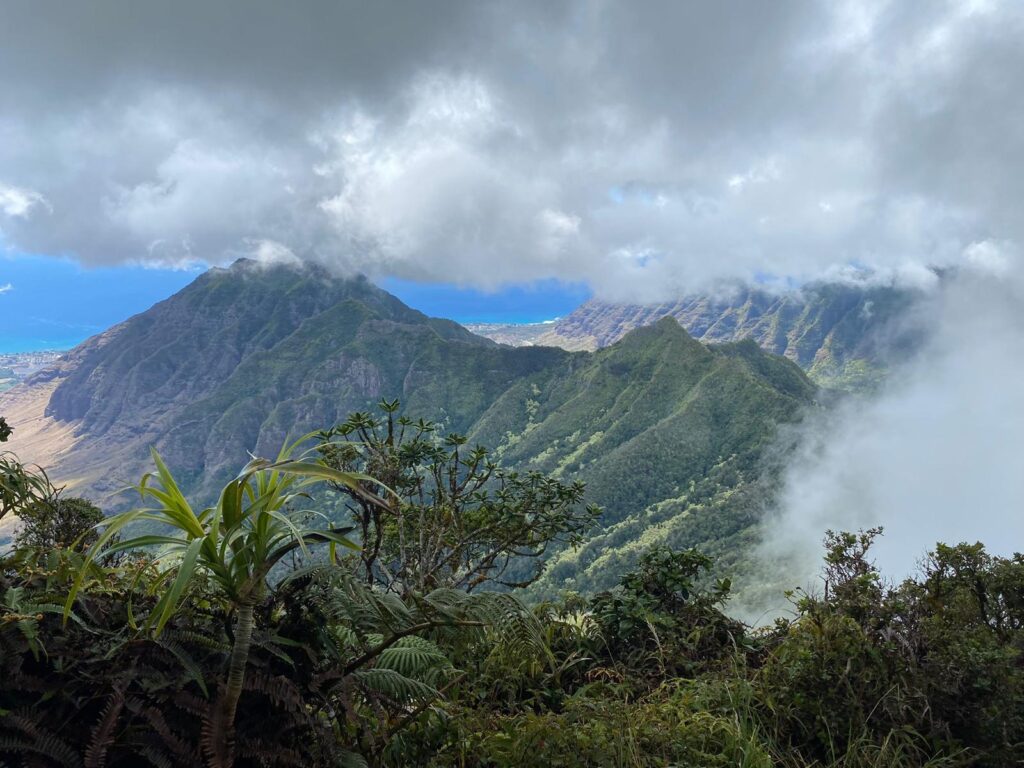
Oahu has so many different things to offer. There is of course the sun and the sand. Every watersport imaginable. A wide variety of top notch restaurants. Unique historical and cultural activities. All kinds of bars and nightlife. But hiking the amazing trails on Oahu is truly fantastic and unique. Whether you are a novice or experienced hiker, there is a trail for you here.
- Considerations
- Basic Hikes
- Less Basic Hikes
- Hard Hikes
- Harder Hikes
- Extreme Hiking
- My Favorite Oahu Hike
Considerations
If you aren’t an experienced hiker, or not experienced hiking in Hawaii, here are a few things to keep in mind.
- If you aren’t an experienced hiker, build your skills and conditioning progressively. Don’t tackle the most difficult trail you can find on your first time out. Start with some of the shorter, flatter hikes to get used to the heat and humidity. Start progressing to some of the steeper hikes to become comfortable with ascents requiring rock scrambling and ropes. The next step is to become comfortable with exposure to shear drops; if you have trouble with heights this is more of a mental and psychological acclimation and not a physical challenge. But, from first-hand experience, discomfort with heights and falls can be overcome to some degree. Next, start going on some longer hikes and build up your conditioning. What you really want to avoid is a situation where the demands of a hike exceed your technical abilities and you end up getting stuck (uncomfortable with either turning around or going forward). You also want to avoid situations where a hike’s length exceeds your conditioning and you become too tired to safely execute some difficult, technical trail sections.
- Take more water than you think you need. Hawaii is hot and humid compared with most places on the mainland. You’ll sweat more and work harder, make sure to stay hydrated.
- Wear the right footwear. The terrain on Oahu is varied and can be challenging. You can encounter slippery stones, loose-packed soil, crumbly volcanic rocks, overgrown vegetation, and deep mud all on the same hike. Be prepared by wearing comfortable shoes or boots with a lot of grip. Micro spikes that you wear over your shoes (like those from Kahtoola) are popular for hikers going on very steep, slippery, or muddy hikes for extra grip. But try to use those only if you need to. Spikes degrade the hiking trails and many people find that they hurt their feet.
- When you start going on some intermediate hikes, you’ll find trail sections with ropes for ascents/descents. There are also hikes which require scrambling over sharp, jagged rocks. Wearing gloves helps a lot for these situations. Uloha in Honolulu sells specialized gloves for hiking but I’ve never had a problem using work gloves from auto parts stores. They are durable and washable, just don’t put them in the dryer.
- Don’t go hiking alone on unfamiliar trails. Don’t go hiking alone on more advanced trails even if you are familiar with them. Fatalities of experienced hikers happen every year. Helicopter rescues of hikers in trouble happen every weekend. Hiking with a friend is a powerful tool to help you if you get in trouble and prevent you from getting into trouble in the first place.
- Use resources like AllTrails, Scoot.io, Gaia GPS, Oahu Hiking Community (OHC) on Facebook, etc. to help you plan and prepare. I pay for an AllTrails subscription and find a lot of value in being able to download trail navigation data ahead of time and not worry about losing reception and getting lost on an unfamiliar hike. Use these resources to get a sense for how long the trail is, how long it should take, what kind of terrain you’ll encounter, and what dangers a specific hike could bring. Being unprepared in terms of supplies, navigation, or physical conditioning can turn a fun time out into a miserable ordeal.
Basic Hikes
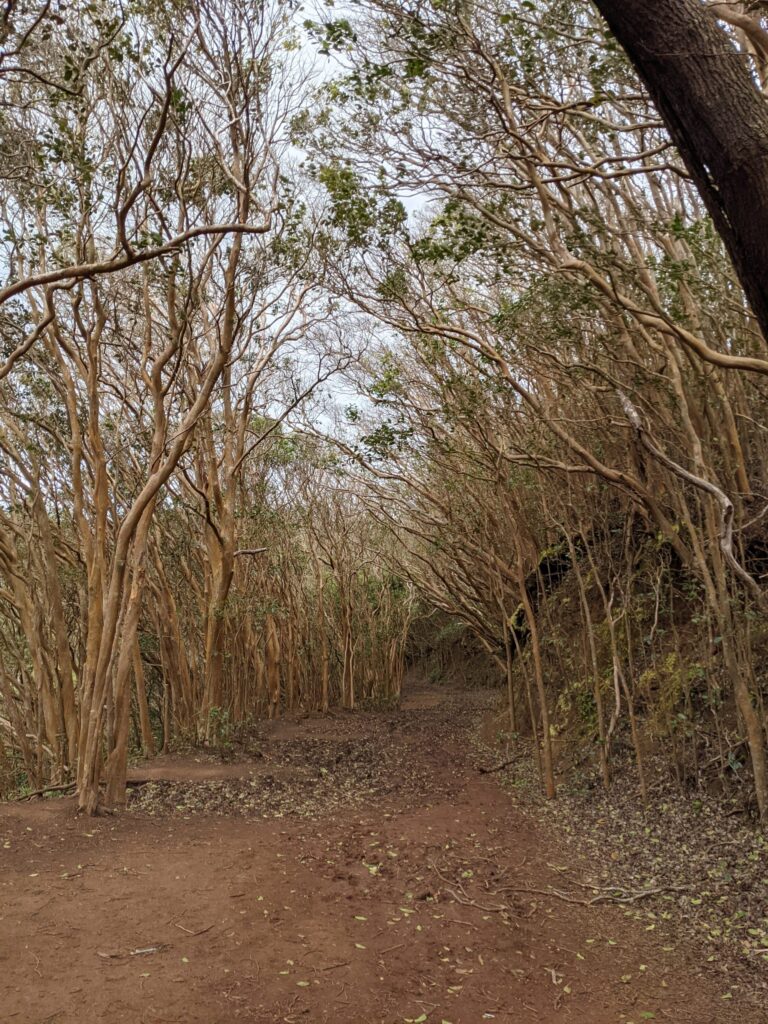
The following hikes are easy and straightforward. You won’t encounter things like uneven terrain, major elevation changes, or dangerous drop-offs. These are popular for families with young children and those with health ailments since they are pretty easy. It is still important to make preparations like sunscreen and plenty of water.
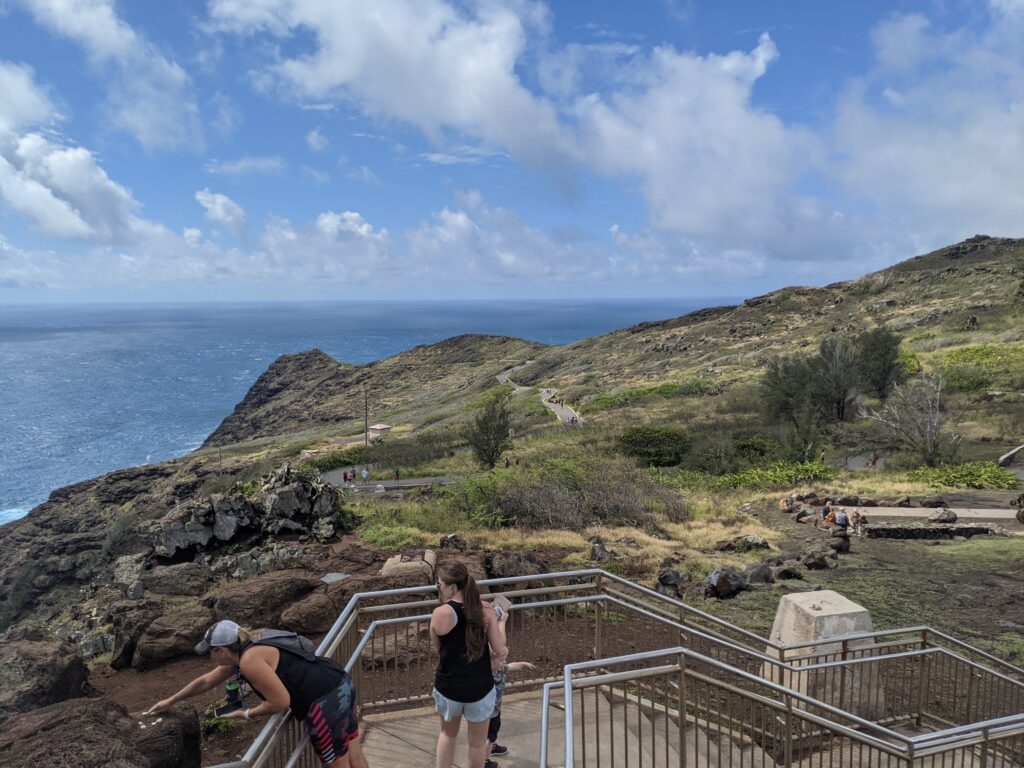
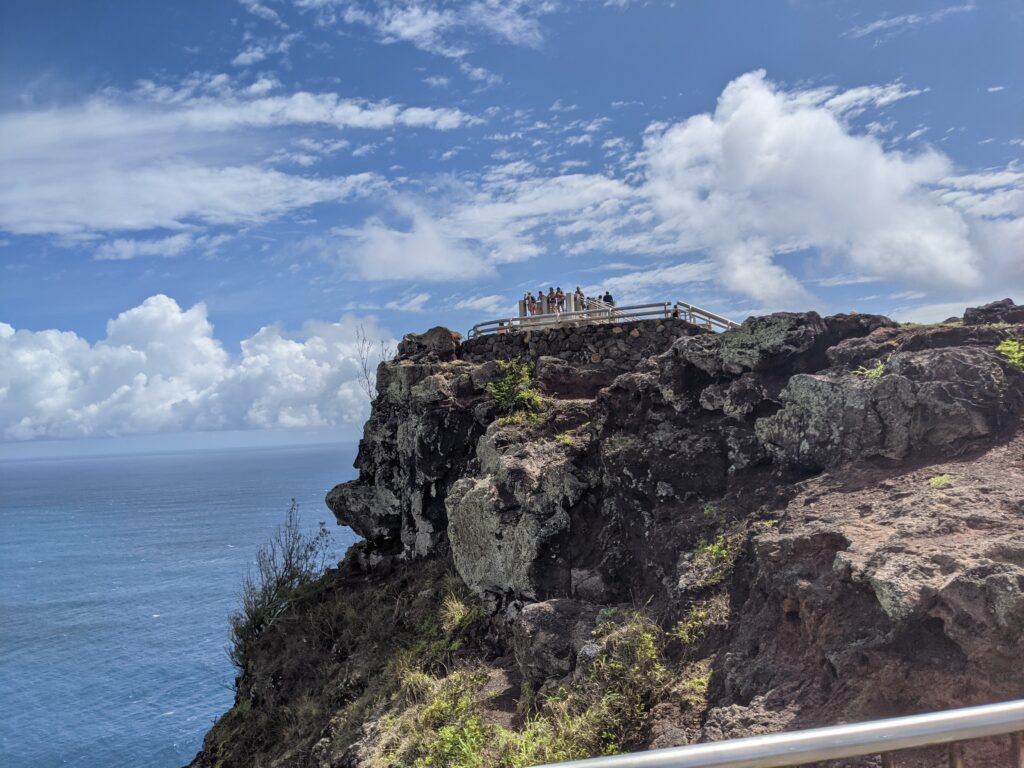
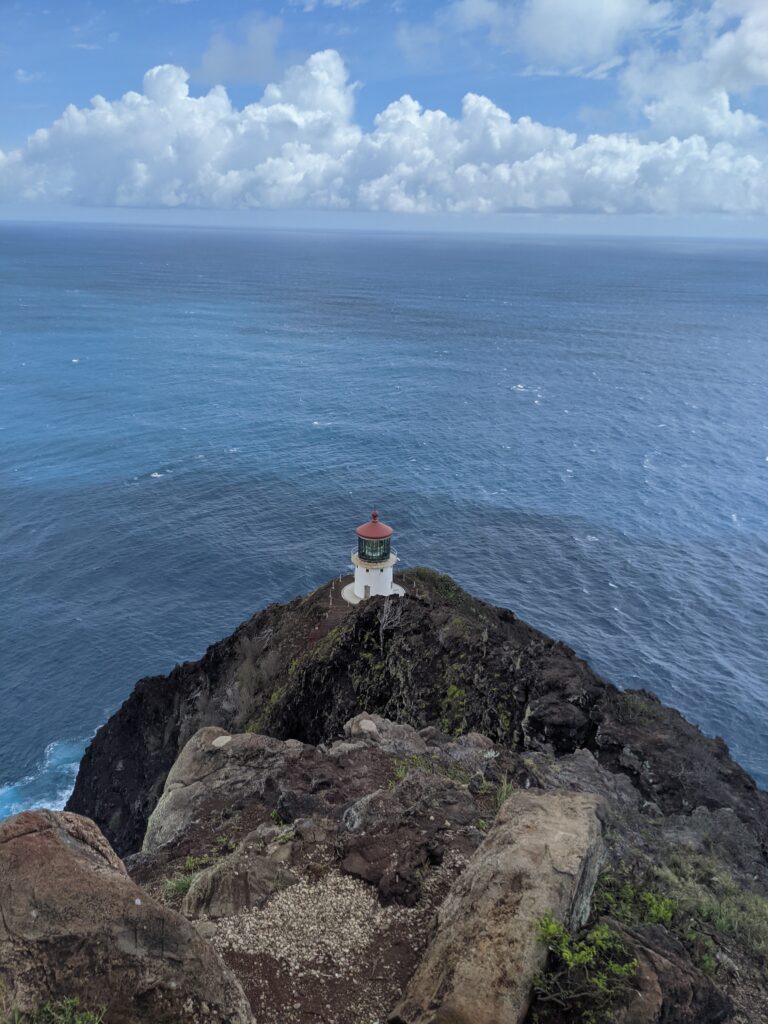
Makapu’u Lighthouse
This is a very popular “hike” and you’ll see all kinds of people from runners to couples pushing strollers on this one. I use the word hike with quotes since this is more like a walk on a graded road. Regular, comfortable footwear is all that is needed; hiking boots will be more of a hindrance than a benefit. Located in the southeastern part of the island, there is a dedicated parking lot for this trail. If the parking lot is full, it is easy to park along the side of the road by the entrance. Just make sure that your car is fully off the road and not even touching the white line or you may get a ticket.
The trailhead is clearly marked and the entire trail is paved. There will be a constant uphill grade but there are plenty of places to stop along the way if you need a break. Make sure to wear a hat and sunscreen since you won’t find any natural sun protection. While you can’t get to the lighthouse itself, the end of the hike has a nice vista point overlooking the lighthouse with views to the east along the windward coast. On very clear days you can see Maui, Lana’i, and Moloka’I to the west. In winter and spring, whales are visible swimming around.
For the more adventurous, it is possible to both go down to the shoreline to swim in the tide pools and clamber up the ridge to check out the pillboxes. Doing those things is definitely more strenuous than a “basic” hike and requires shoes with good grip and comfort with going up and down very steep, unpaved trails.
AllTrails Link: https://www.alltrails.com/trail/hawaii/oahu/makapu-u-point-lighthouse-trail
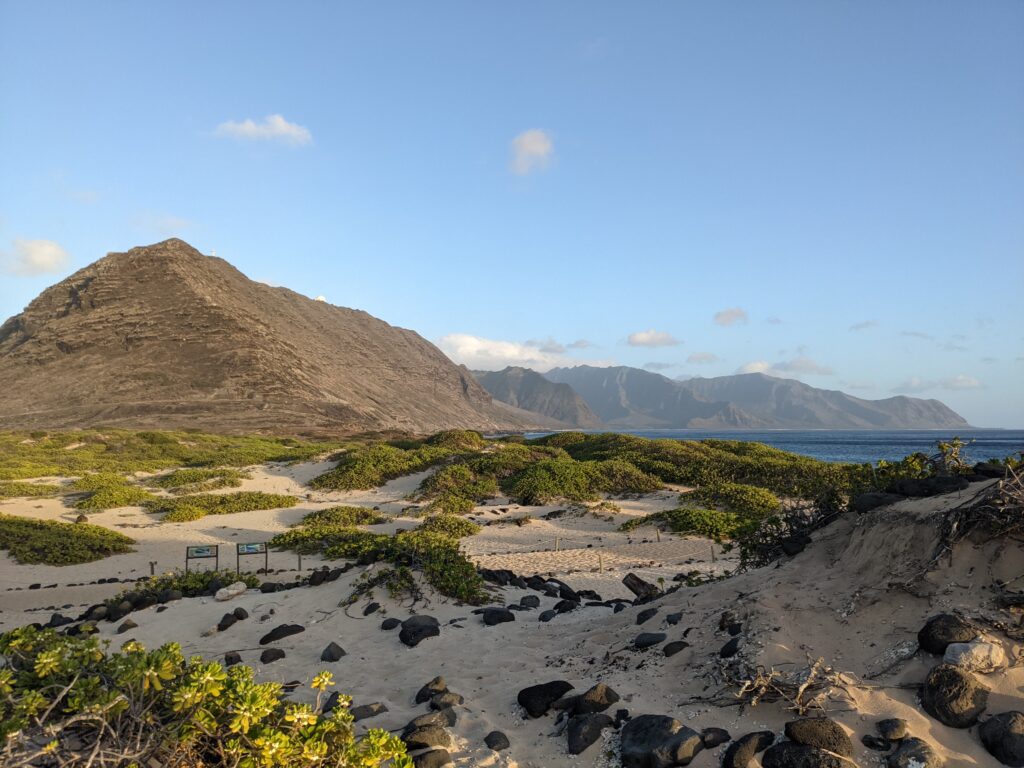
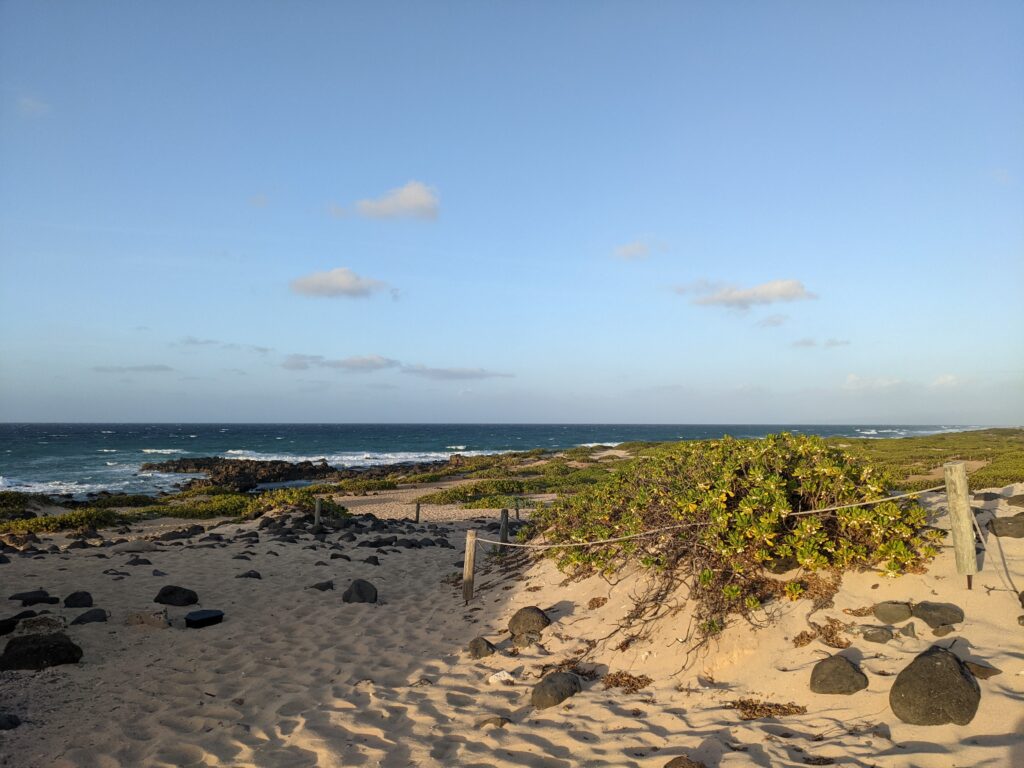
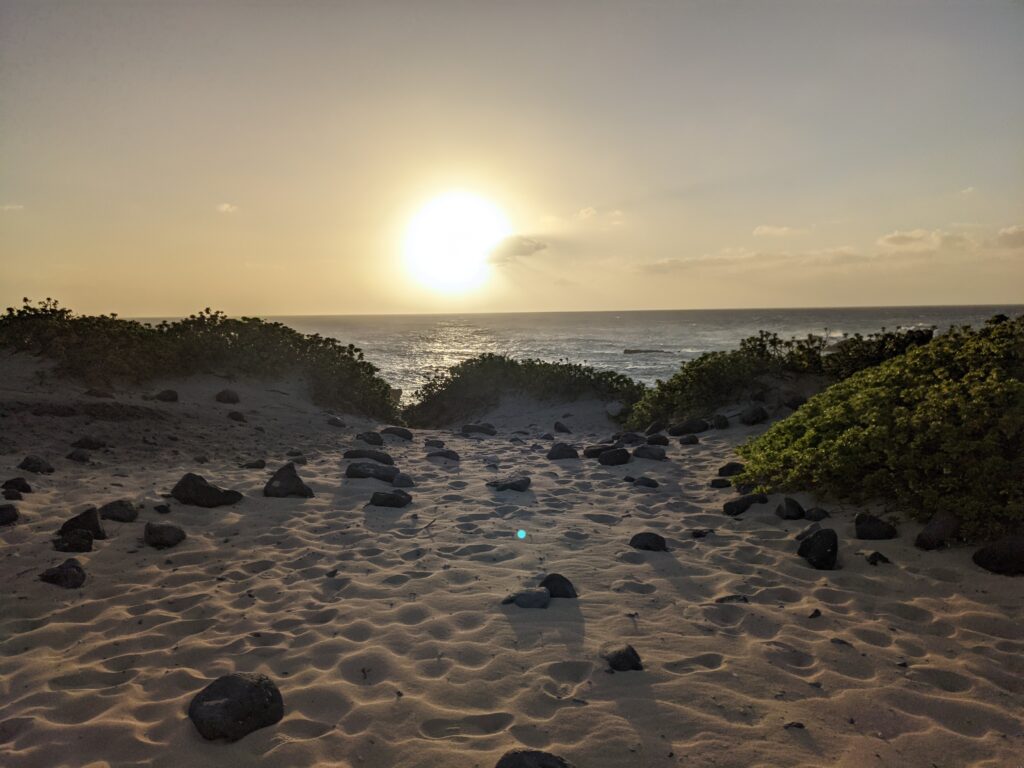
Ka’ena Point
The westernmost part of the island, the Hawaiians believed that this is where your soul went upon your death before departing the physical realm for the spiritual one. Bringing water and sun protection is important for this hike and good hiking shoes are recommended. The trail is pretty flat and completely safe, but it is unpaved. After a rain, it can be muddy.
There are two ways to get to the actual “point”. You can access this trail from the west side of the island by parking at the Yokohama Bay beach and hiking the trail northwards. You can’t miss it, you just drive down Farrington Hwy until it ends. You can also access this trail from the north shore side of the island and hiking west to get to the point. Drive west past Waialua down Farrington Hwy (same name as the west-side road, but a very different road) until the road ends and you will see the trailhead and a parking area. It is possible to hike from the north shore side to the west side (or vice versa) but that will transform an easy hike into a 12 mile there-and-back trek.
My personal preference is the trail on the west side. Either way you go, the distance will be the same and the trail will be pretty flat. You will get beautiful views of the ocean crashing against the rocks on both trails. The point itself becomes sandy and you can see a lot of marine life in the water. It is possible to see lots of fish, eels, seals, and whales splashing off shore. The area surrounding the point is nest habitat for albatrosses so it is important to stay on the trail in those areas.
AllTrails Links: https://www.alltrails.com/trail/hawaii/oahu/kaena-point-trail-from-south & https://www.alltrails.com/trail/hawaii/oahu/kaena-point-via-farrington-highway
Waimea Falls
Located on the North Shore across the road from Waimea Bay Beach, this is not a publicly accessible area. This is a paid-access, privately run attraction. It is suitable for young kids and those with strollers. This is less of a real hike and more of a walk through a beautiful botanical garden area and some ancient Hawaiian structure recreations. The end of the trail culminates in the waterfall itself. Going swimming in the waterfall is safe and easy, mandatory life jackets are provided by the operators of the attraction.
More information can be found at: https://www.waimeavalley.net/
Less Basic Hikes
These hikes will be more challenging than the Basic hikes. You’ll start to see some steeper, uneven terrain. These are still very safe and don’t require any special skills or equipment.
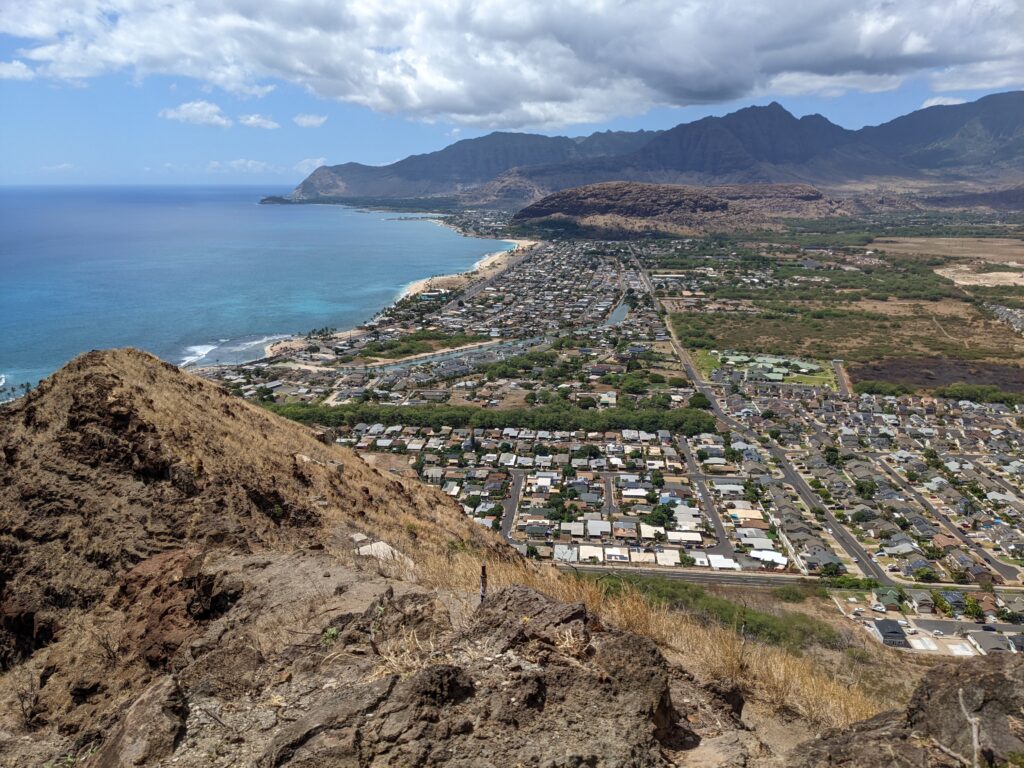
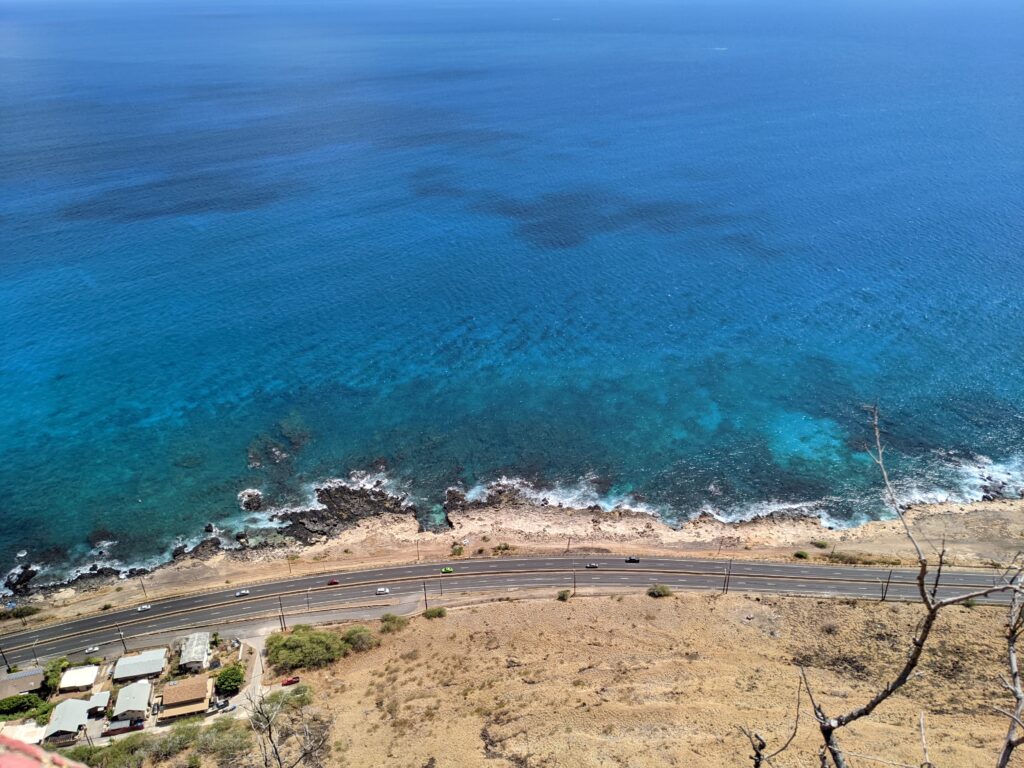
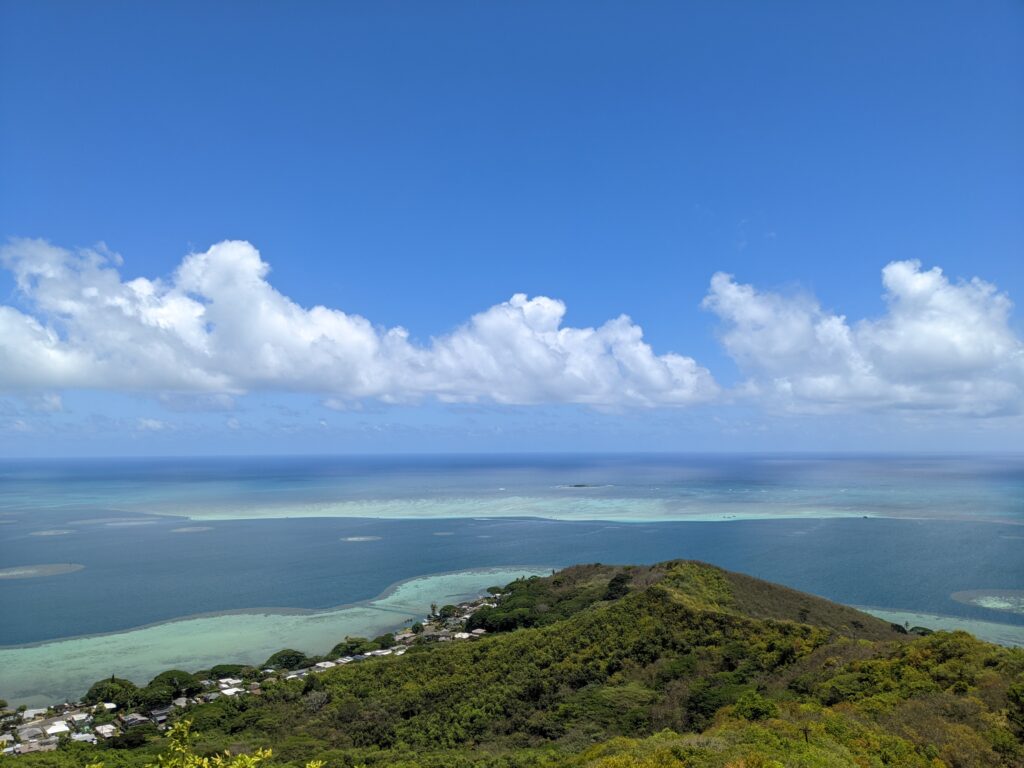
Pink Pillbox
The quintessential west side hike. Access to the hike is easy, just park on the side of the road by the trailhead and start walking up the hill. This trail is manageably steep (bring hiking poles if this is a concern) and safe throughout. If you are not used to hiking or hiking more than flat trails, this will be a nice conditioning challenge. This is a very popular trail and it is well worn, so getting lost should not be an issue. The trail is completely exposed to the sun, and the sun in Waianae is especially harsh, so sunscreen and water are absolutely required.
Getting to the top will reveal some WW2-era concrete pillbox structures. You can go inside of them or climb on top of them. Watching a sunset over the ocean from the top of a pillbox is a popular activity for locals and tourists alike. If you go for sunset, bring a flashlight so you can illuminate your way down in the dark afterwards. Besides the ocean, you are also treated to beautiful views of the Maili and Waianae portions of the town of Waianae as well as the Waianae Valley itself. You can continue hiking past the pillboxes, but I don’t recommend that for novice hikers.
AllTrails Link: https://www.alltrails.com/trail/hawaii/oahu/puu-o-hulu
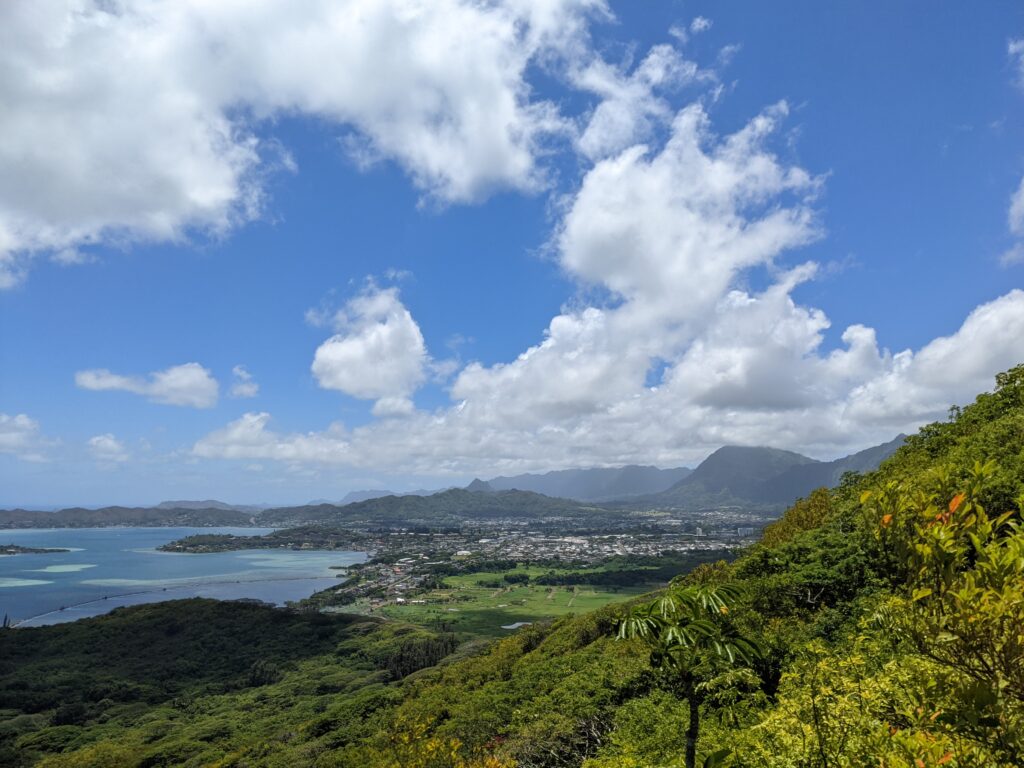
Wiliwilinui
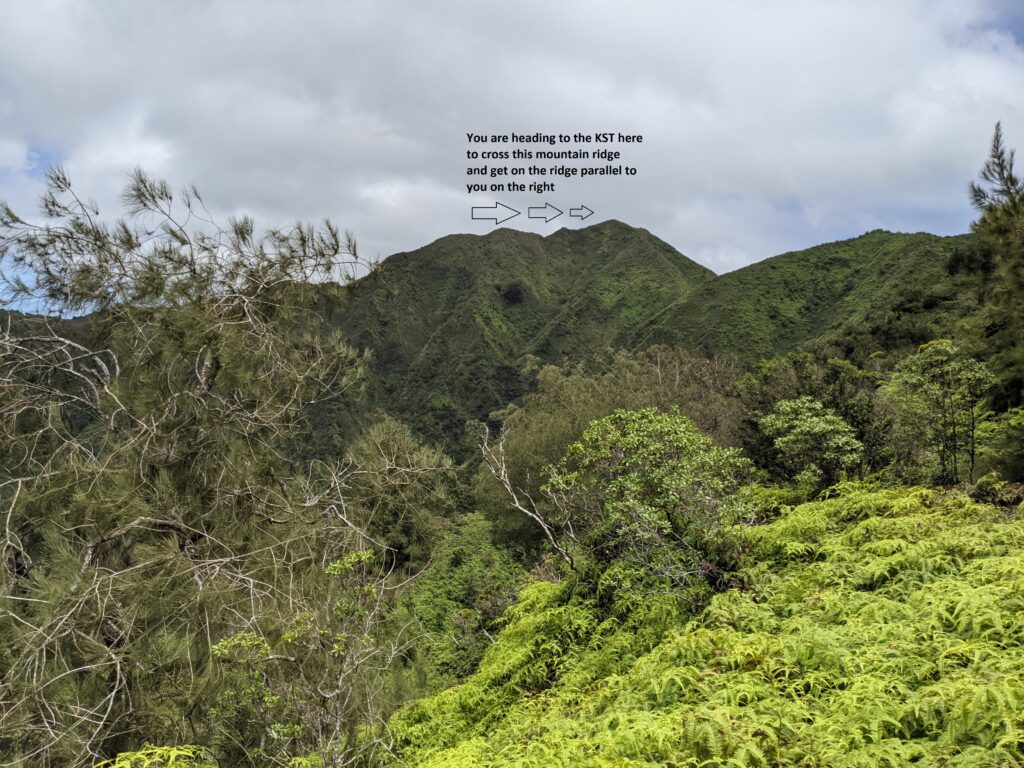
You will find a very typical Honolulu ridge hike here. The neighborhoods of eastern Honolulu are built amongst the numerous valleys created by the ridges rising up from city-level towards the high mountainous backbone of eastern Oahu (the Ko’olau Summit Trail [KST] mountain system containing the high mountain peaks and ridges/saddles/crossovers connecting them). The residential neighborhoods of eastern Honolulu are built in the valleys between the ridges. Some of the ridges also have housing developments part-way up the ridge itself. To access this ridge hike, you will need to drive through a private neighborhood on the ridge. Stop by the guard shack and get a parking pass from the guard. The parking lot is near the trailhead. The number of passes per day is limited and this is a popular hike, so it is better to try this hike on a weekday when there would be fewer people trying to do this hike.
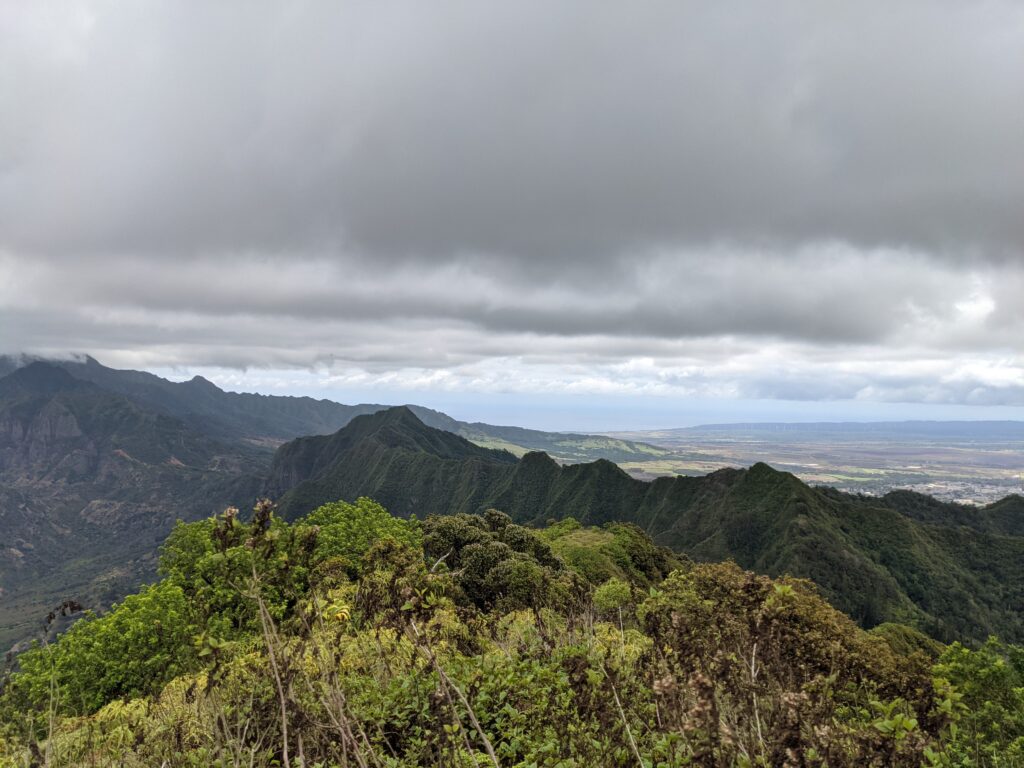
This ridge hike is recommended for less experienced hikers since you won’t find any “twists” here. The trail is easy to follow, there aren’t any technical climbing sections, drop-offs & heights are not a factor, and the terrain is mostly easy (but could be very muddy after a rain). What you will get is a hike that maintains a steady, constant elevation change and a little bit of additional length compared with some of the other previously mentioned hikes. Getting to the top will reward you with a great view of the surrounding valleys and ridges, views of the KST, and a nice view looking down the Honolulu skyline.
AllTrails Link: https://www.alltrails.com/trail/hawaii/oahu/wiliwilinui-ridge-trail

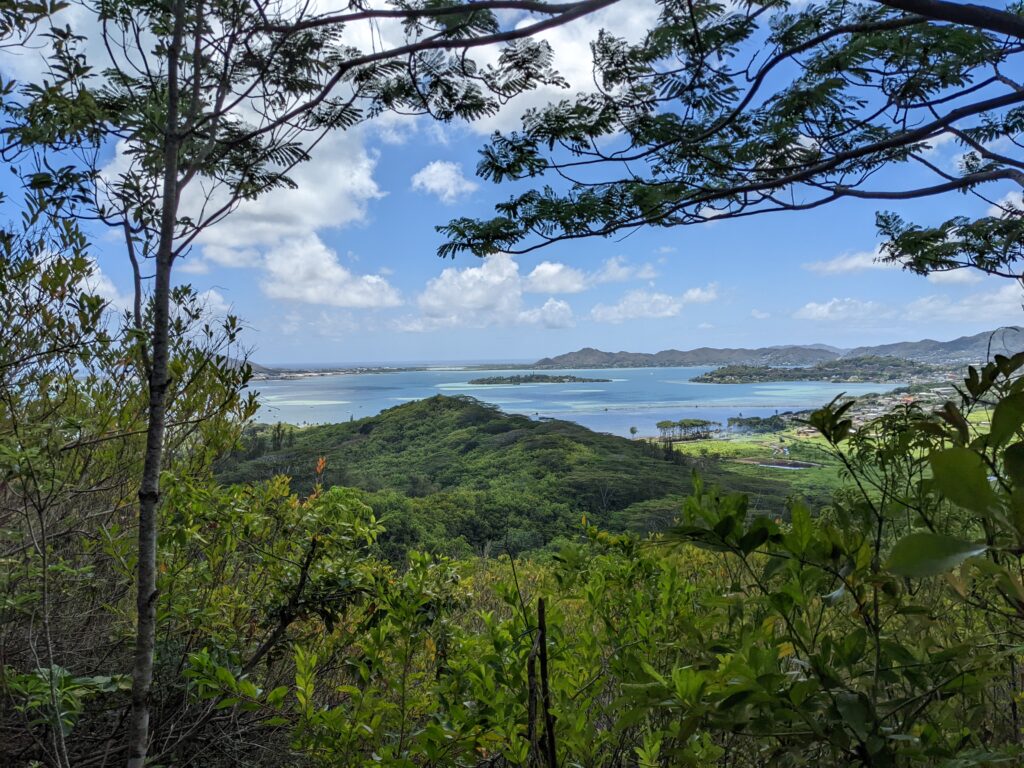
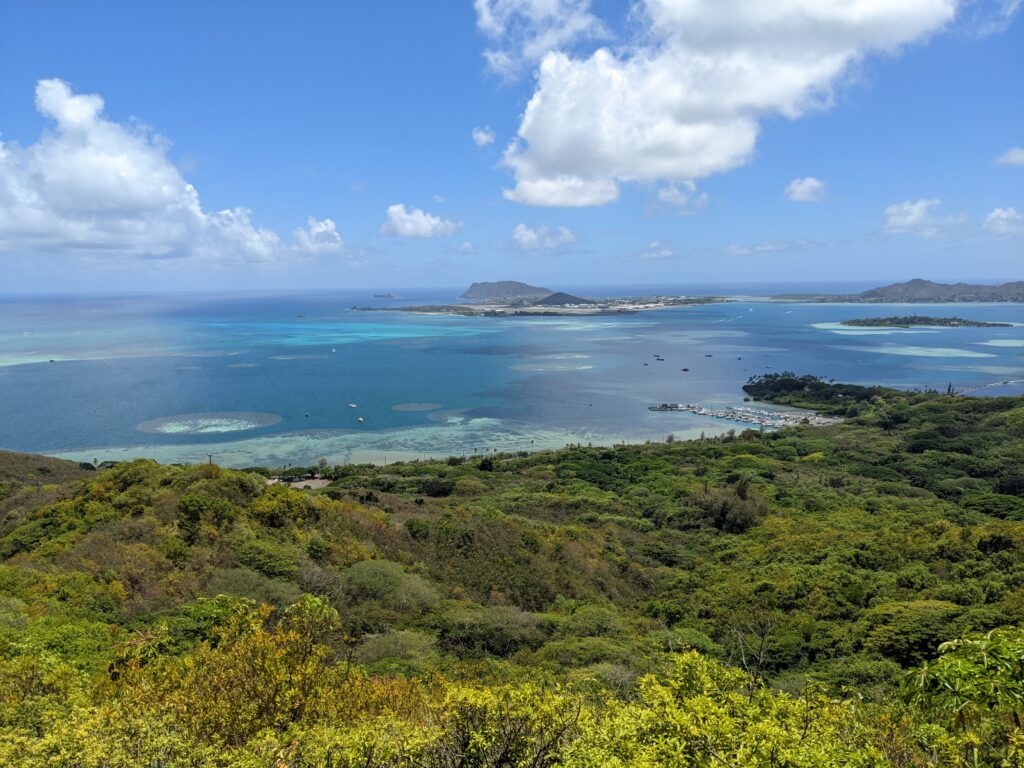
Pu’u Ma’eli’eli
Enjoying the view out over Kane’ohe Bay is the reward for getting to the end of this trail and the reward far exceeds the effort of the hike. This trail introduces a new, but common to Oahu hiking, twist. The trailhead is not very obvious and you need to park somewhere else and walk to the trailhead before you can start the hike. In this case, you will park in the parking lot of the Times/McDonalds shopping plaza. You will then proceed to walk to the main road and hop over the metal railing to follow the trail parallel to the road to get to the trailhead on your left. This is not that dangerous since you are separated from the traffic on the main road by the metal barrier.
The hike itself starts of very steeply. There is a mix of dirt sections (which can be very slick after a rain) and sections with lots of tree debris under the forest canopy. Shoes with good grip are a must. Hiking poles can help too. The trail is pretty short and parts of it are covered by a forest canopy, but bringing plenty of water is still recommended. When you reach the end, you are treated with a spectacular view looking out over the water. You can see boats and kayakers going out to the Sandbar, the Marine Corp base in the background, and beautiful views of the KST to the south and north.
AllTrails Link: https://www.alltrails.com/trail/hawaii/oahu/puu-maelieli-trail

Hard Hikes
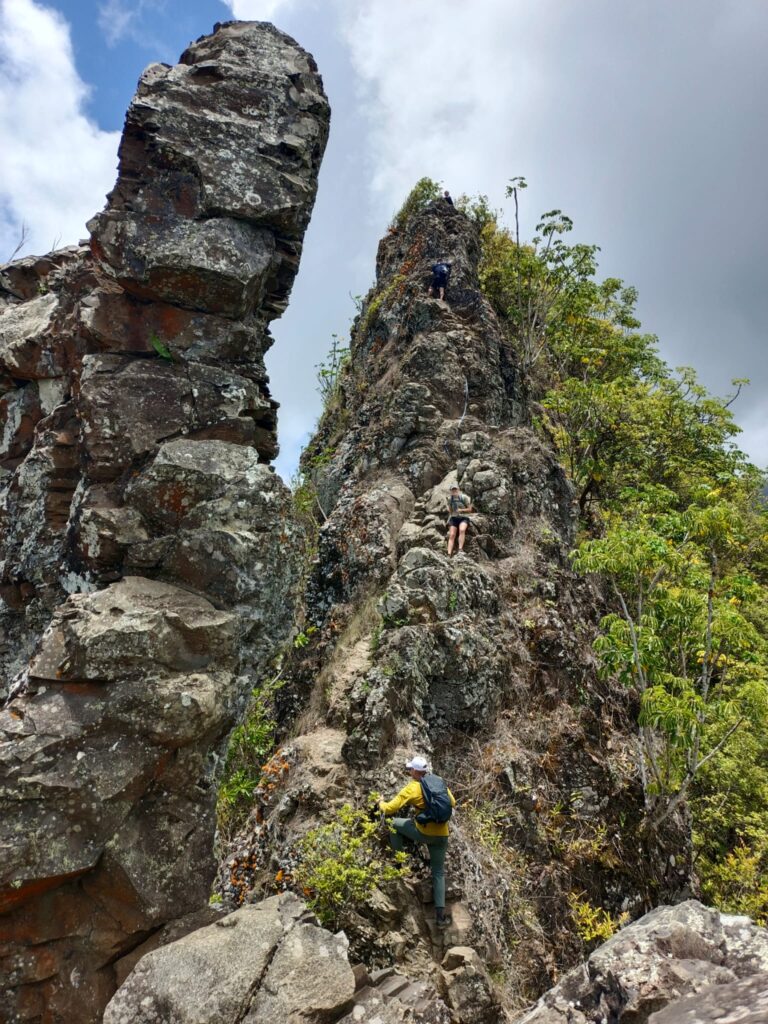
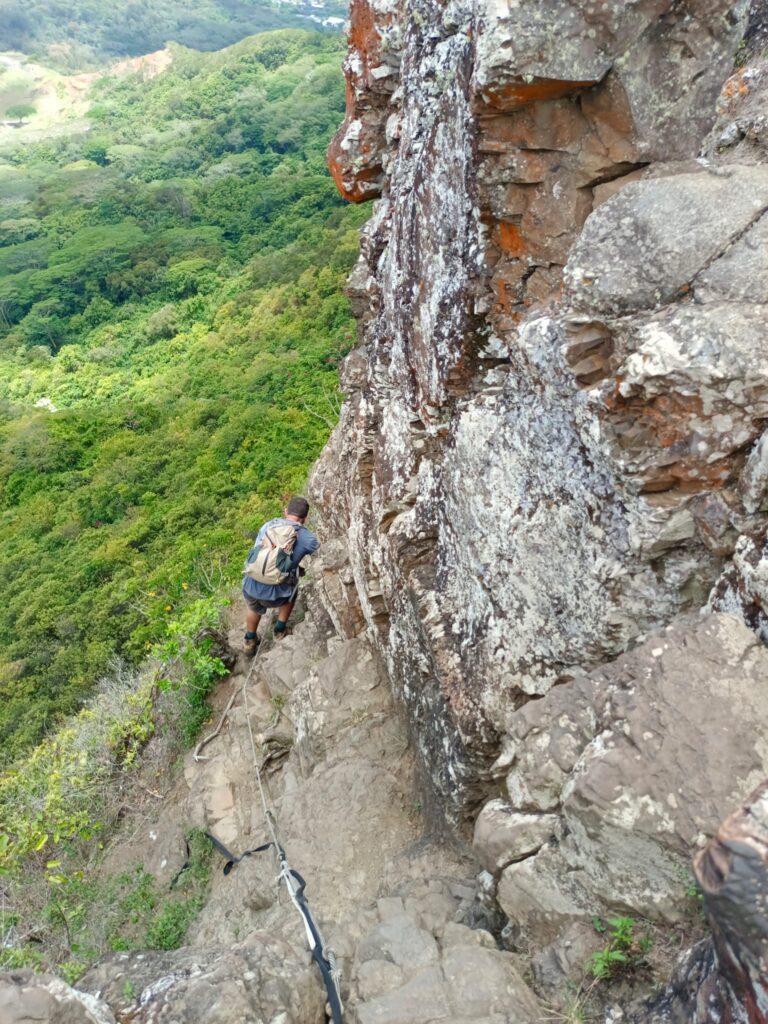
These hikes will start to physically challenge you based on length and steepness. You will also encounter dangerous areas on these hikes where you need to traverse narrow ledges with multi-thousand foot sheer drops on either side. Climbing ropes and scrambling over rock faces will also be a factor.
Kahekili
Start getting used to climbing ropes to go up/down rock faces and potentially dangerous sheer drops. This is a hike on the eastern side of the North Shore with beautiful ridge and ocean views, but starts to bring some challenges. The first challenge is getting to the trailhead. The trail starts at the end of a street going through a residential neighborhood. Parking is very limited near the trailhead and it is possible that you may need to park off of the main coastal road (Kamehameha Hwy) and then walk through the neighborhood to get to the trailhead.
Now the other challenges start, but this is a great hike to develop the skills needed to overcome those challenges. It is very steep to get from the start of the trail to the ridge. There are some switchbacks at the start of the hike, but it soon evolves (devolves?) to going straight up some parts of the trail. It is pretty manageable on this hike since there is a good amount of vegetation on the sides of the trail to help you and using the ropes is pretty straightforward and doesn’t require concentration for optimal foot placement. You can just power straight up. When you get up to the ridge, the challenge of the elevation gain goes away and the hike becomes flatter. This is a good hike to become comfortable with walking along ridges with drop-offs on either side. The ridge here is wider than on many other hikes and because it is flat-ish, you don’t need to worry about climbing up/down along the ridge. Just keep the focus on not falling off either side. If you reach a point where it looks like you have to climb over a massive rock in the middle of the trail to continue, look for a contour trail to go around the rock instead.
This is quite a challenging hike from the conditioning aspect, you will spend a lot of energy climbing up the side of the mountain to get to the ridge. But when you do get to the ridge, make sure you take a moment to enjoy the spectacular views.
AllTrails Link: https://www.alltrails.com/trail/hawaii/oahu/kahekili-trail


Kuli’ou’ou Loop
The Kuli’ou’ou ridge hike is a very nice and straightforward ridge hike in Honolulu. Normally, this ridge is a pretty normal up-and-down, in-and-out-the-same-way ridge hike offering some great views of the ocean and the KST. However, it is possible to extend and turn this hike into a much more adventurous loop hike.
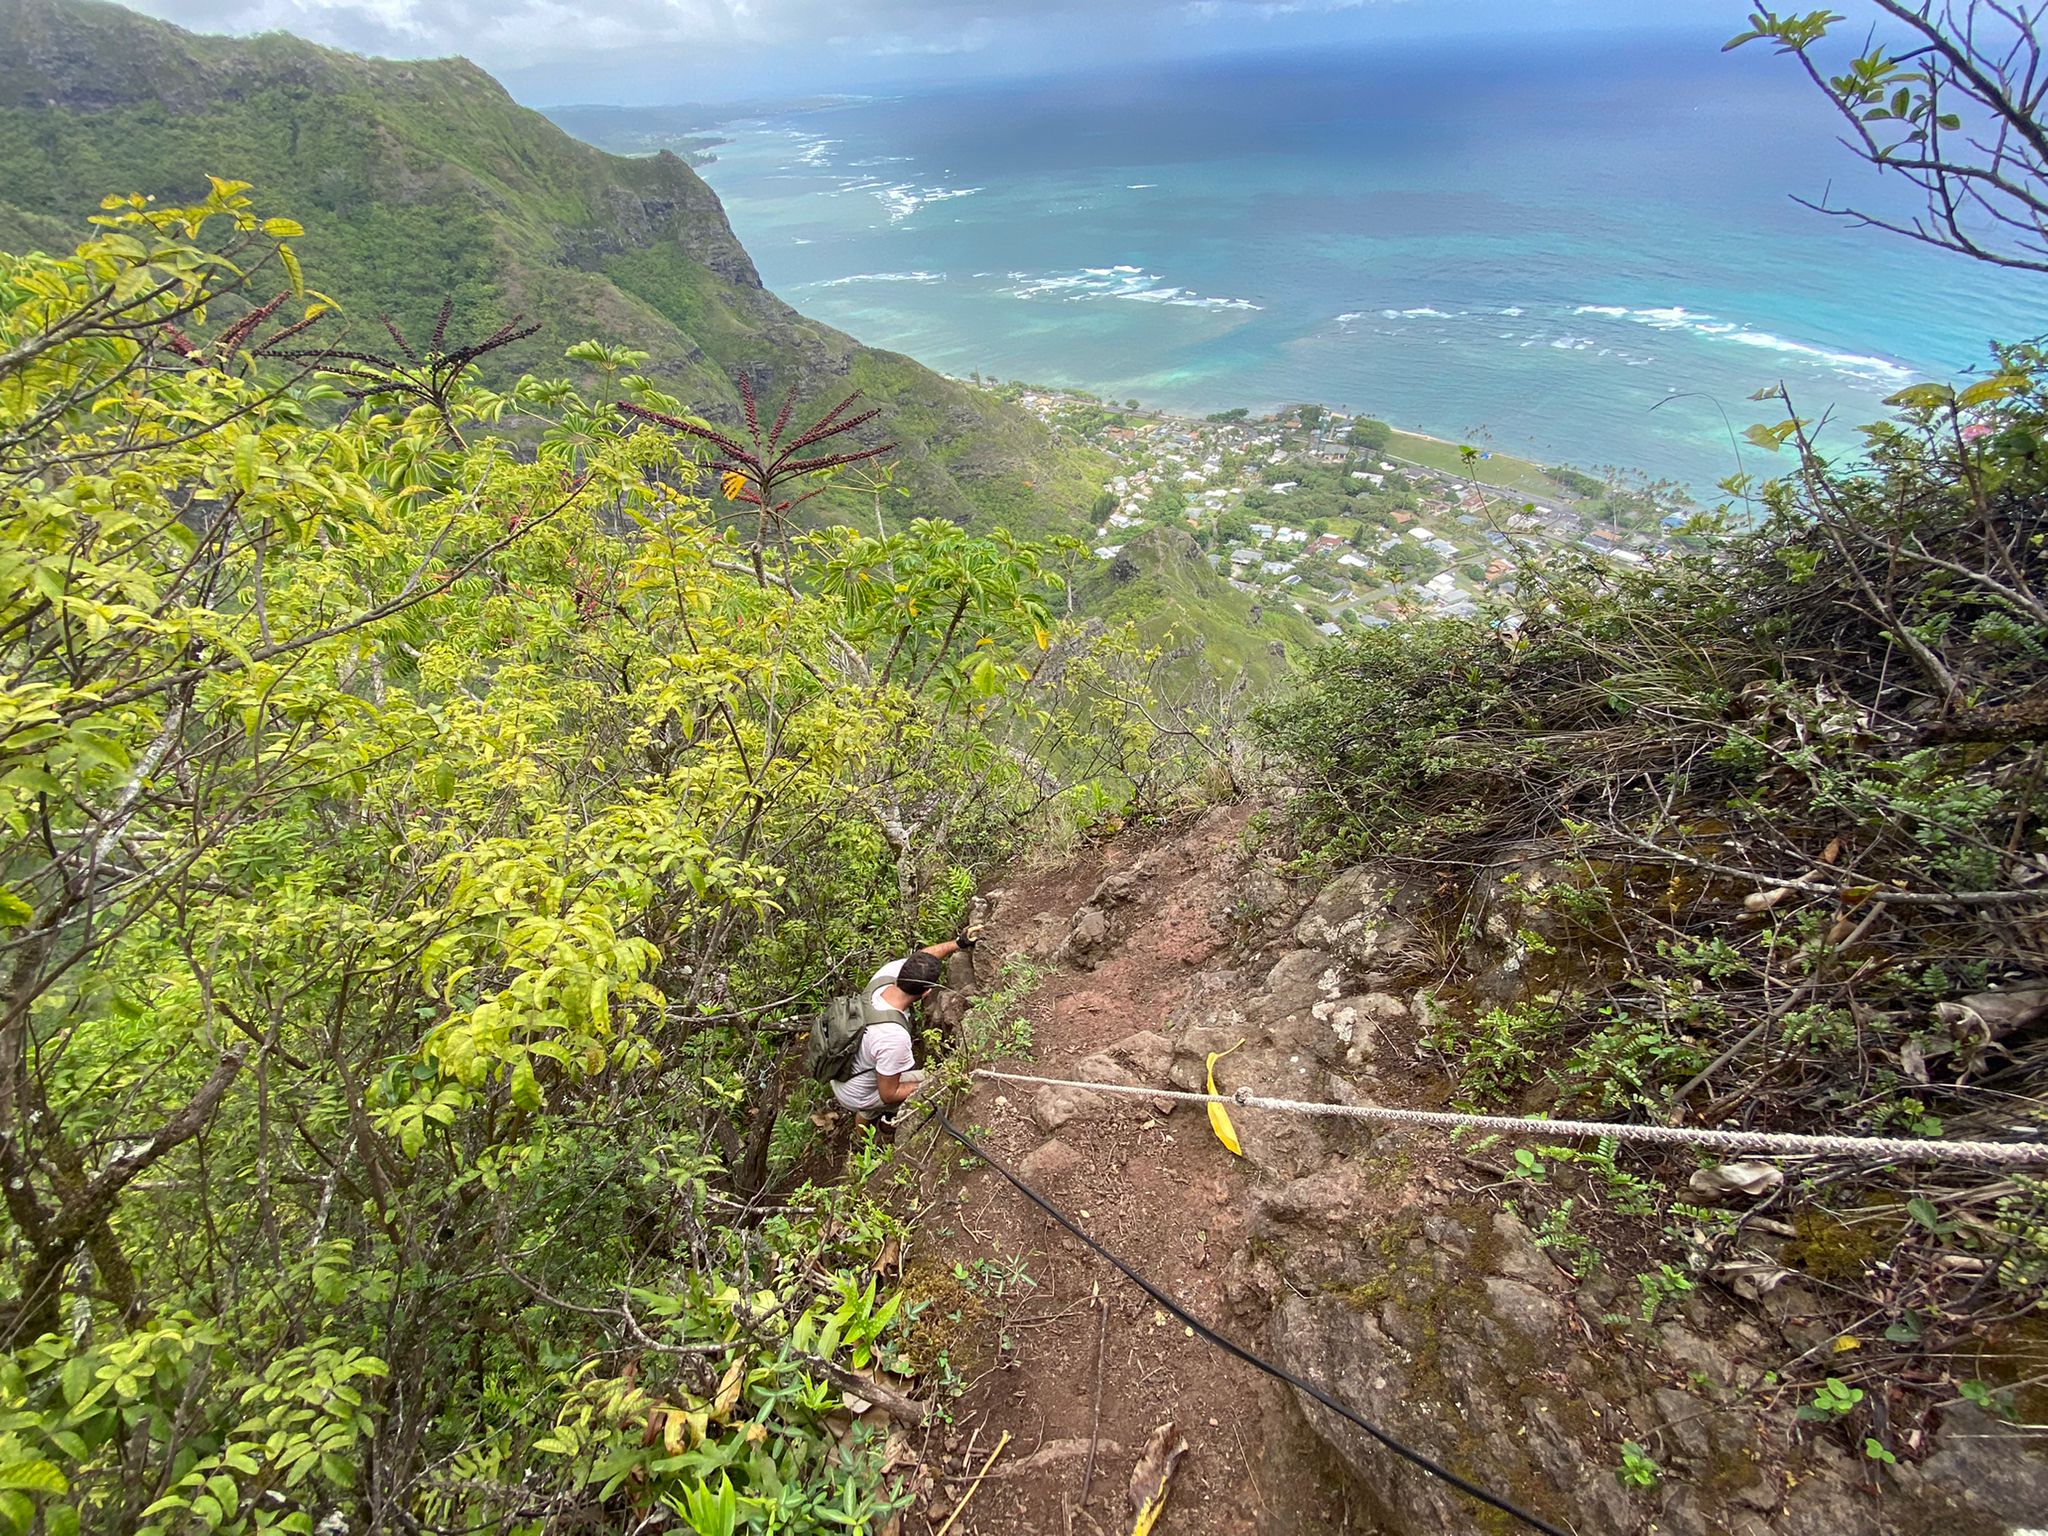
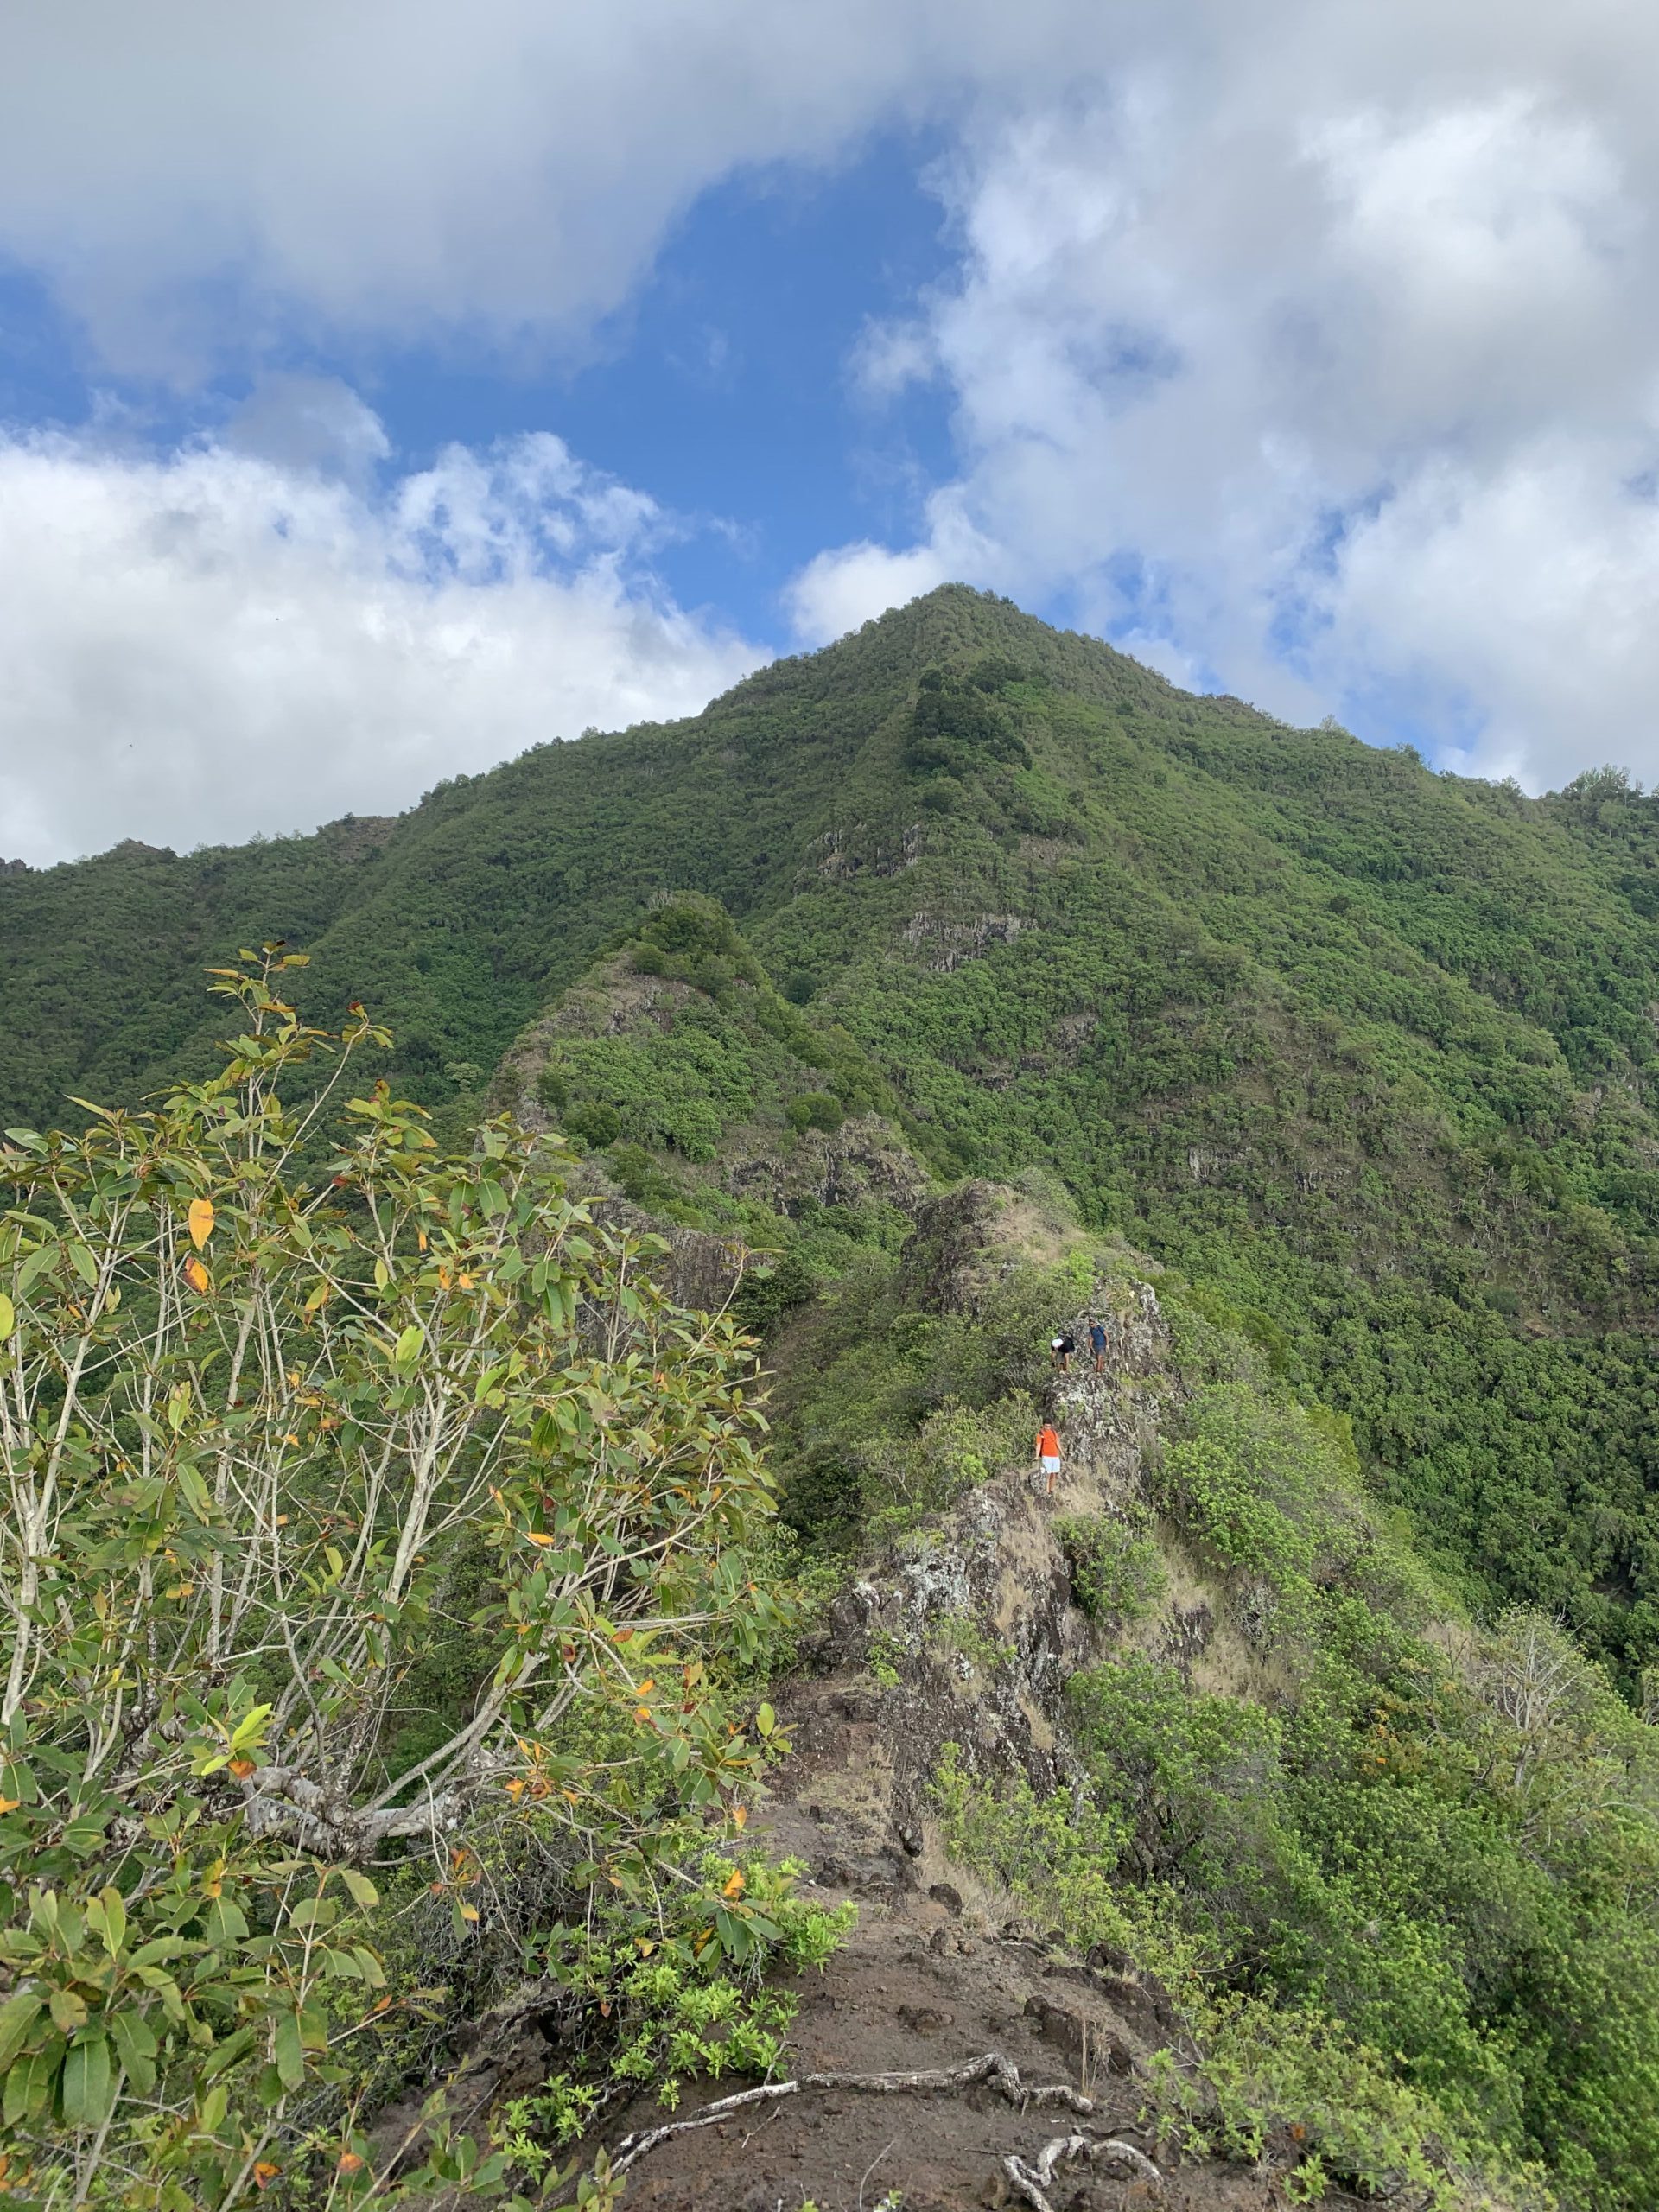
From the trailhead, instead of going up the Kuli’ou’ou ridge trail, continue walking down the path until you can access the ridge to the west of the Kuli’ou’ou ridge. We will go up this ridge, reach the KST system and traverse that, and then reach the Kuli’ou’ou ridge and follow that down as usual to get back to the trailhead. The western ridge is pretty steep to go up but it is shaded by the forest canopy. When you get to the KST section, you will be using some ropes to climb up and down steep/sheer faces. The KST section will also introduce you to a narrow section with steep, straight drop-offs to one side. This is a good place to become accustomed to this because the drop-offs are only on one side, there is vegetation on the other side of the path so there is no danger of falling off into the abyss. Remember, there are other hikes without a wall of vegetation supporting you on one side so falling into the abyss can happen from either side. The wind can also be a factor here. It can blow very strongly along the KST section and the top of the Kuli’ou’ou ridge section. If the gusts makes you uncomfortable, then take a seat and wait for it to die down a bit.
AllTrails Link: https://www.alltrails.com/trail/hawaii/oahu/kuliouou-ridge-trail-loop
Kea’au Middle Ridge
Things get interesting and challenging here. This hike should absolutely be done with other people, preferably with someone who has done it before. It is long and physically strenuous with a decent amount of climbing over and around rocks and rope sections. There are areas where you need to traverse narrow ridges with drop-offs on both sides. The elevation gain and steepness is significant. Navigation can also be challenging, it is highly advisable to use a navigation aid like a hiking GPS or the AllTrails app on your phone since going through the forested area can be tricky. The Waianae sun will be shining on your head for most of the hike as well. To access the hike, you will be parking on a road behind a privately operated gate. Start your hike as early as you can because if you don’t finish the hike before early evening, your car will be trapped behind the gate when they close it for the day (you also can’t start too early since the gate may not be open yet…).
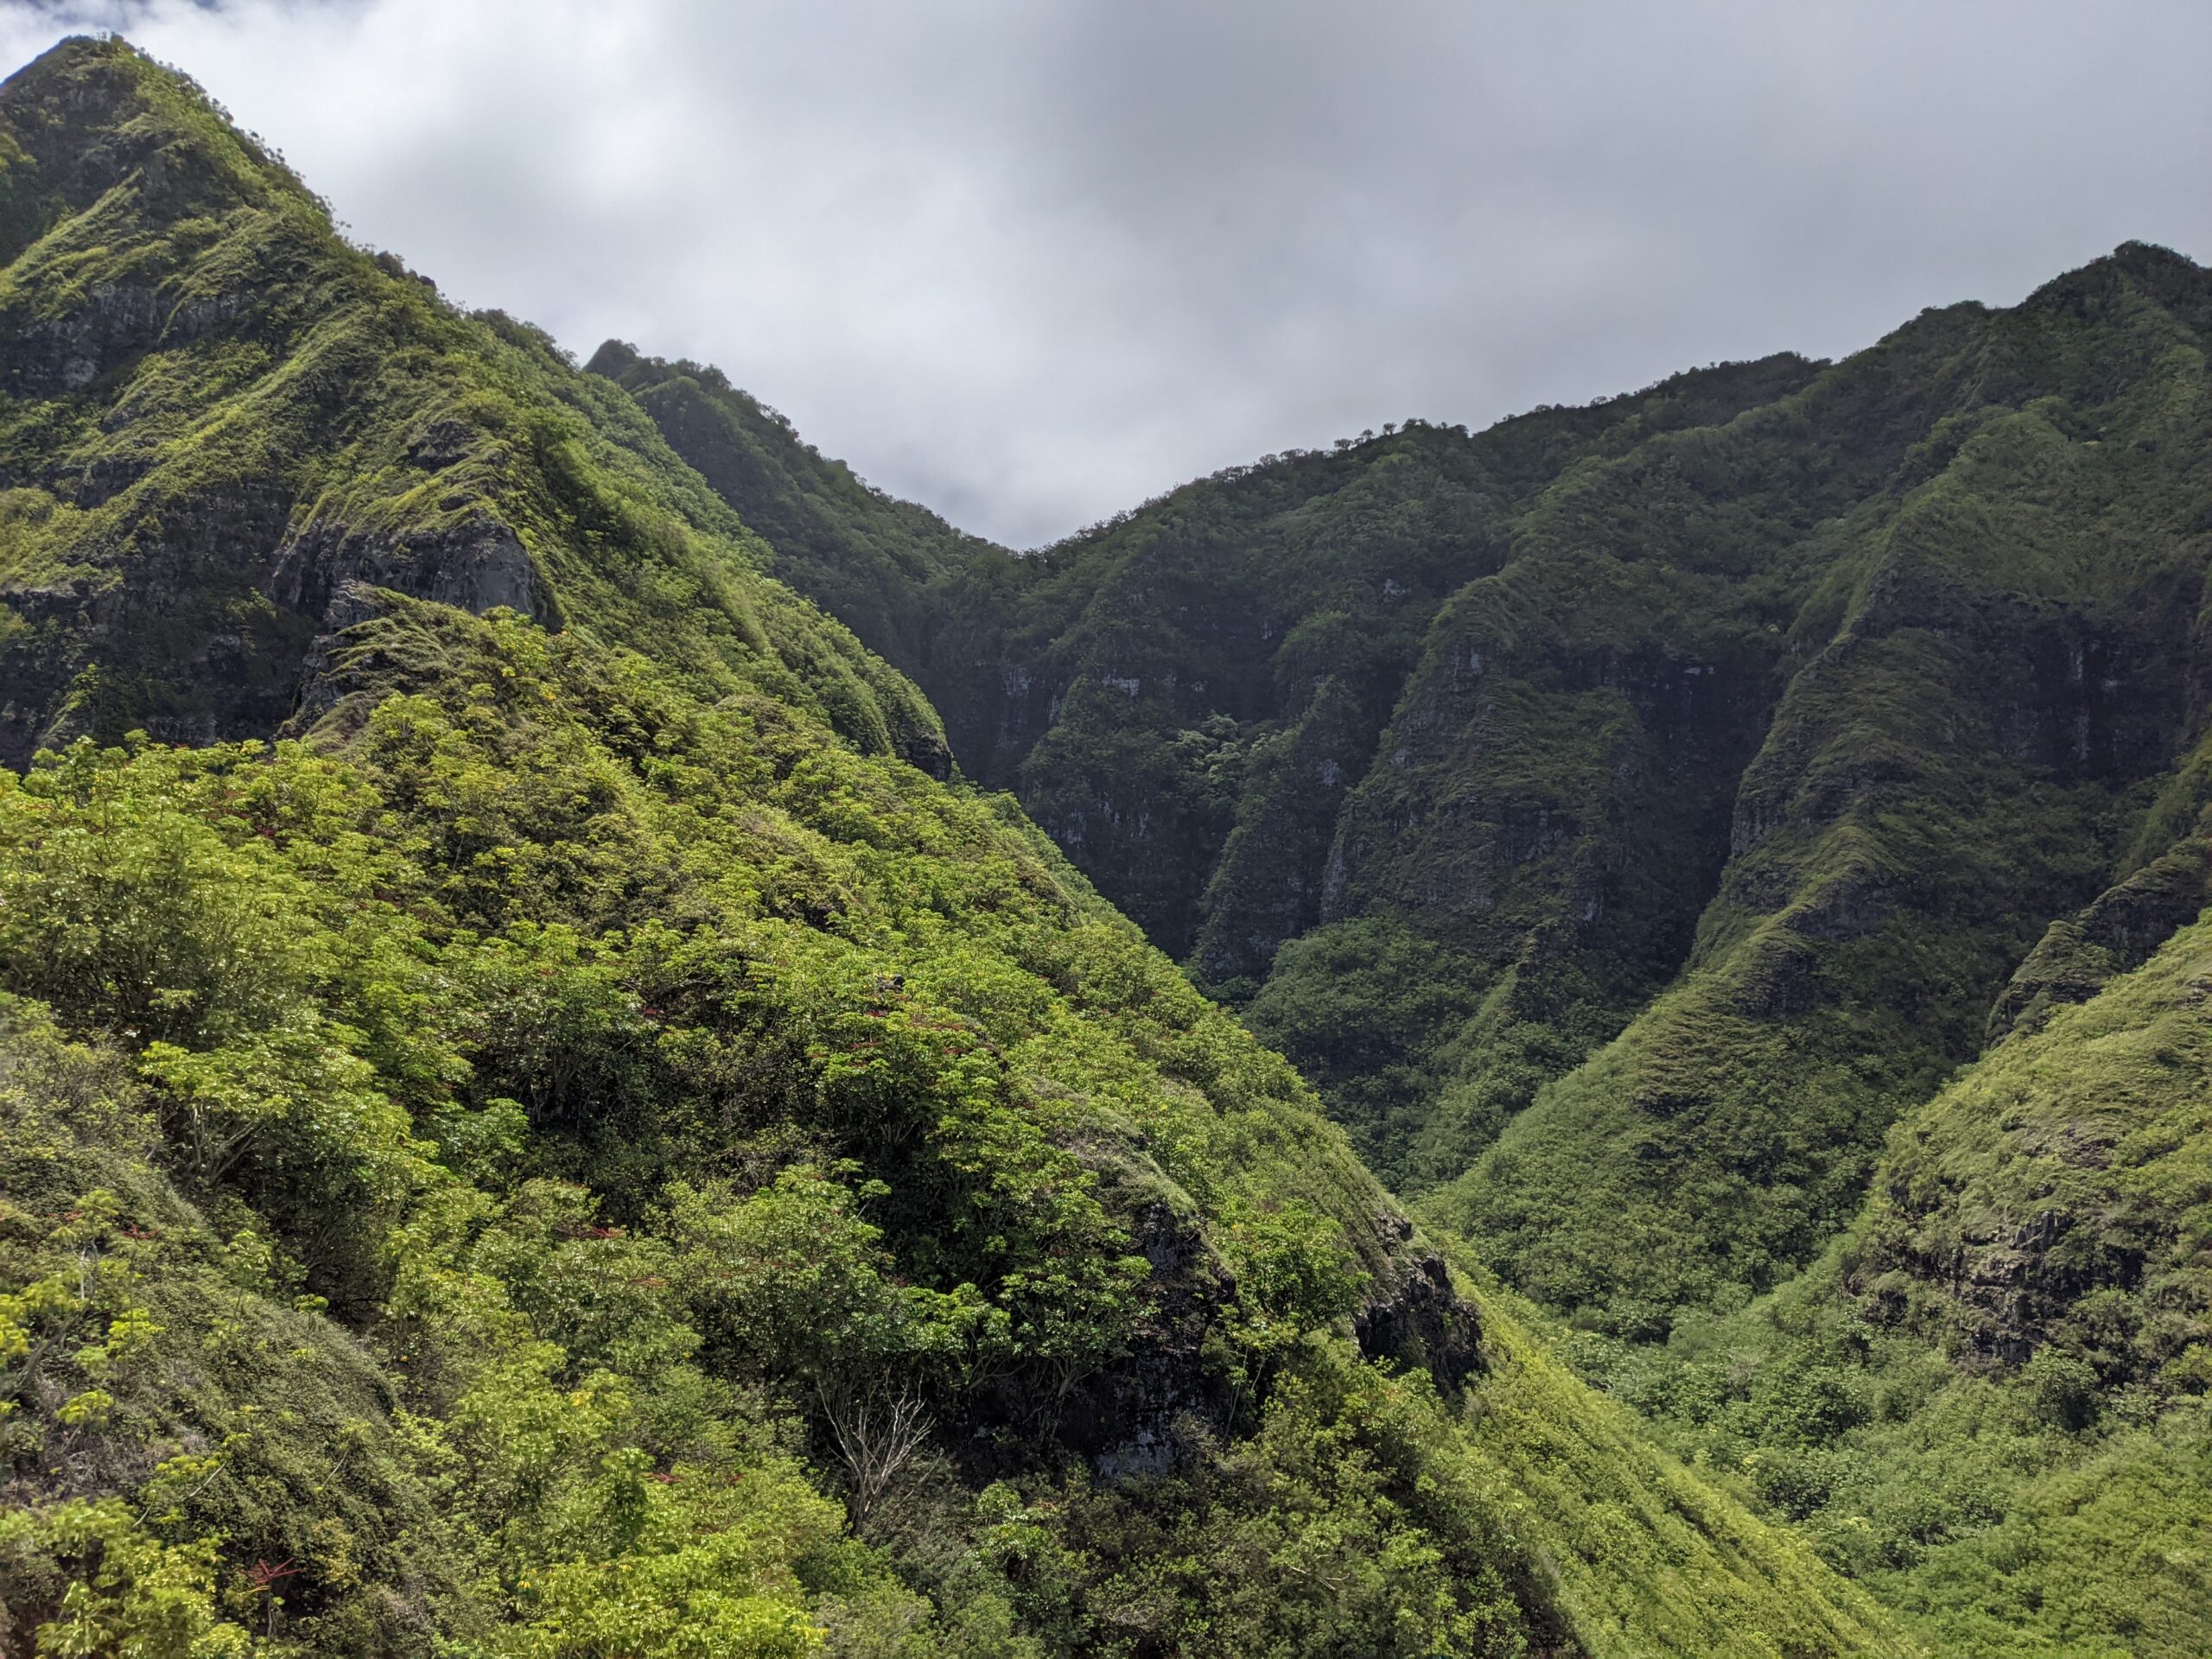
If you aren’t scared off yet and feel comfortable with the challenge, this hike will put together many of the elements found on some of the previously mentioned hikes. And the reward will be one of the most majestic valley views you can find.
AllTrails Link: https://www.alltrails.com/trail/hawaii/oahu/keaau-middle-ridge
Harder Hikes
It is highly recommended that you go with others who have done these hikes before for your first time. They are going to challenge your conditioning and will have dangerous areas with steep drop-offs. Be prepared with plenty of food and water. Aids like hiking poles will help. Bringing gloves will help for climbing ropes and rock faces.
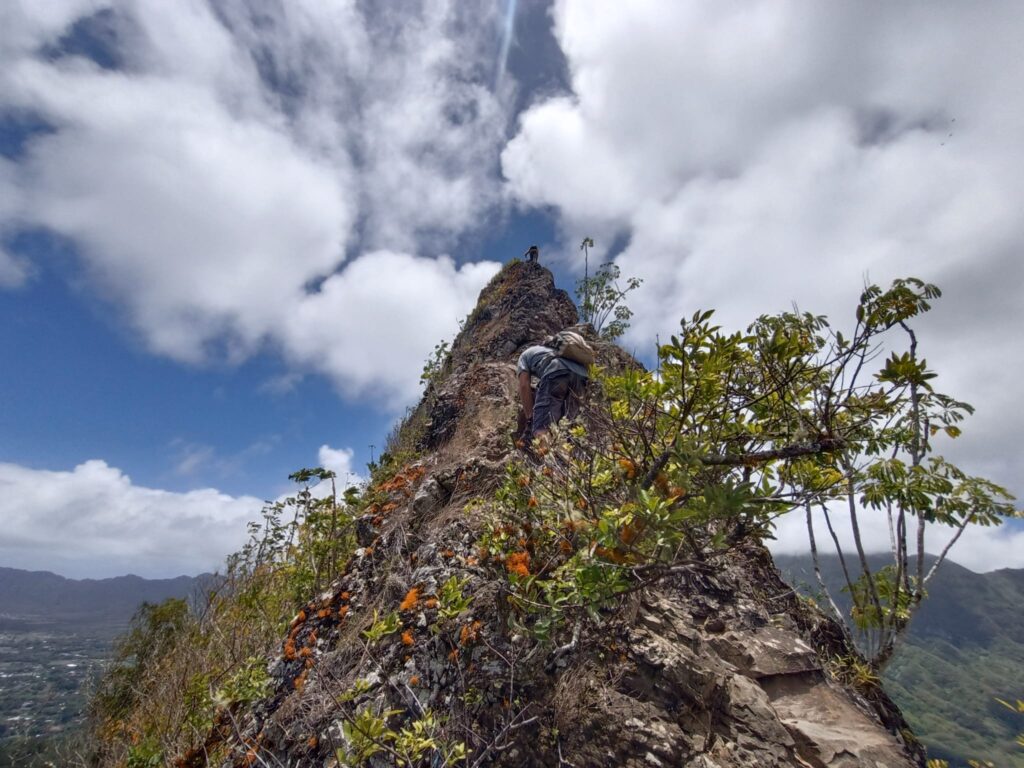
Olomana
This is a classic and popular hike also known as Three Peaks. As that name implies, this hike consists of climbing up and down between three mountain peaks. This hike will be challenging in terms of length, steepness, technicality in climbing ropes and rocks, and comfort with heights/falling into the abyss. The challenge of getting to the third peak is something that many hikers work up to progressively. Maybe going only to the first peak and back on their first attempt. Then going to the second peak and back on their second attempt. And then going to the third peak on a subsequent attempt. If you want the best view and nothing else, then making it to the first peak is all you need. You get a fantastic, unique view of the entire windward side. Olomana is unique in that it rises up on its own surrounded by flatland; it is not connected to the KST mountain system.
This is a hike where you must park in a residential neighborhood and then walk along a paved and lightly trafficked road to get to the trailhead. Getting dropped off by a friend/Uber could be easier than leaving your car. If you drive yourself, you’ll be parking around 902 Auloa Road, make sure you park completely off the road and that your tires are not touching the white line or you will get a ticket. There have been cops looking to give tickets at this area every time I’ve done it. On the flipside, the cops are very friendly and you can ask them if your parking job is ok before you head out for the hike.
The trailhead is easily visible off of the paved road and will have information about the fatalities that have occurred on this hike. Getting to the third peak is dangerous and there are many opportunities to suffer falls of dozens or hundreds or thousands of feet. Getting up to the first peak requires covering the most distance. You start off in a fairly flat forested area but the elevation starts increasing rapidly at some point. To get up to the top of the first peak, you will need to use ropes to go up and over a large rock face. You will then walk along the ridgeline for a bit before getting the top of the first peak.
Getting from the first peak to the second peak is fairly straightforward and a pretty short jaunt. Most likely, when you get to the second peak there will be a hammock there strung between two trees. Going from the second peak to the third peak is quite a technical challenge.
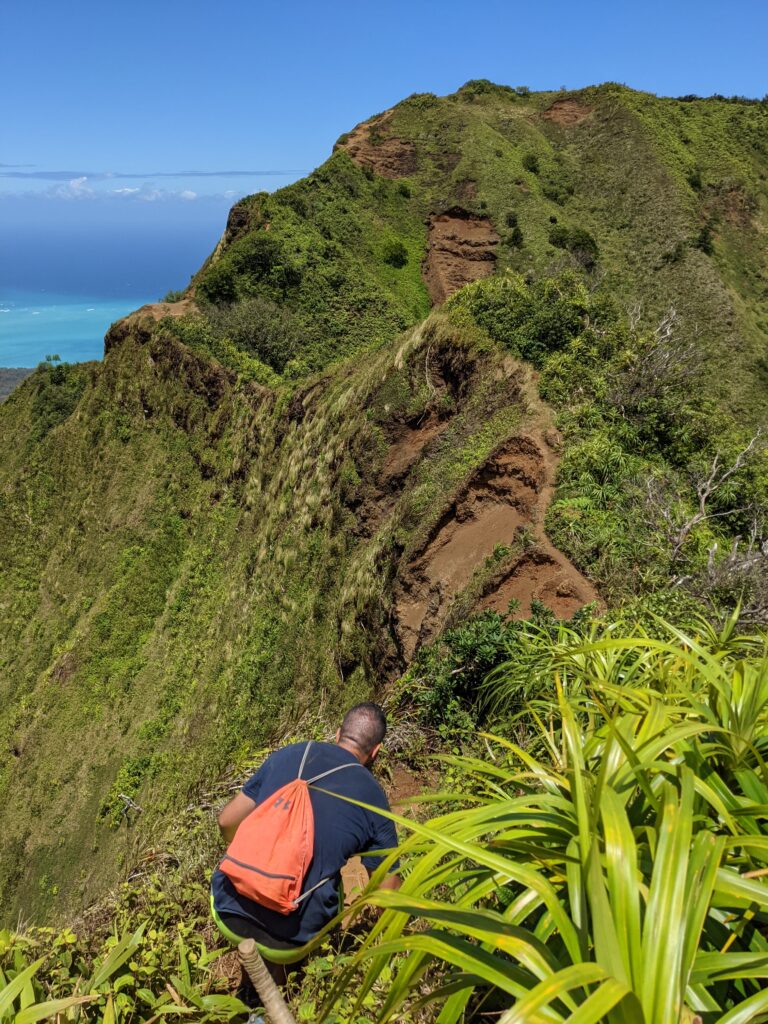
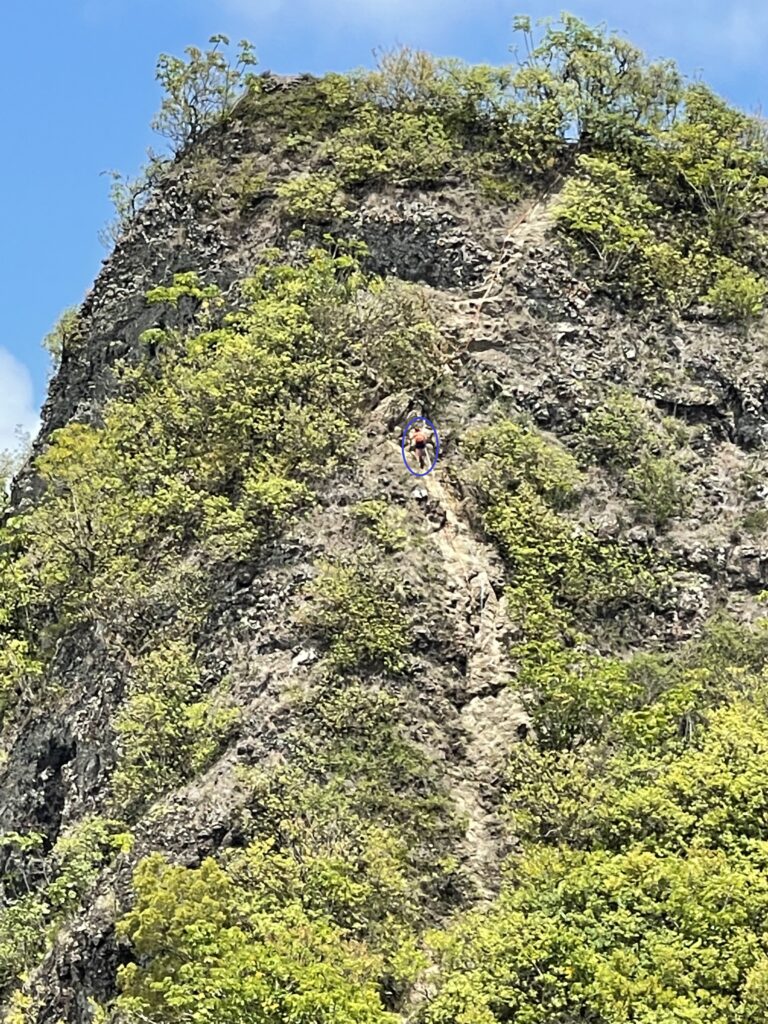
It is not a large distance laterally, but from the second peak you must descend a very long way straight down using a rope before repeating what you just did but in reverse and climbing up over and around rocks to get to the third peak. In the first picture below, find the person I’ve circled in blue roughly in the center of the photo. That gives you a sense of the scale of the rock face you need to go down using the ropes. Climbing up to the third peak offers plenty of opportunity to fall into the abyss. And when you get to the third peak, you need to repeat the adventure again but going the other way. This is definitely an adventure to test how comfortable you are with heights and rope climbing. And when you are done with all of that, you still need to walk back to your car…
AllTrails Link: https://www.alltrails.com/trail/hawaii/oahu/olomana-trail
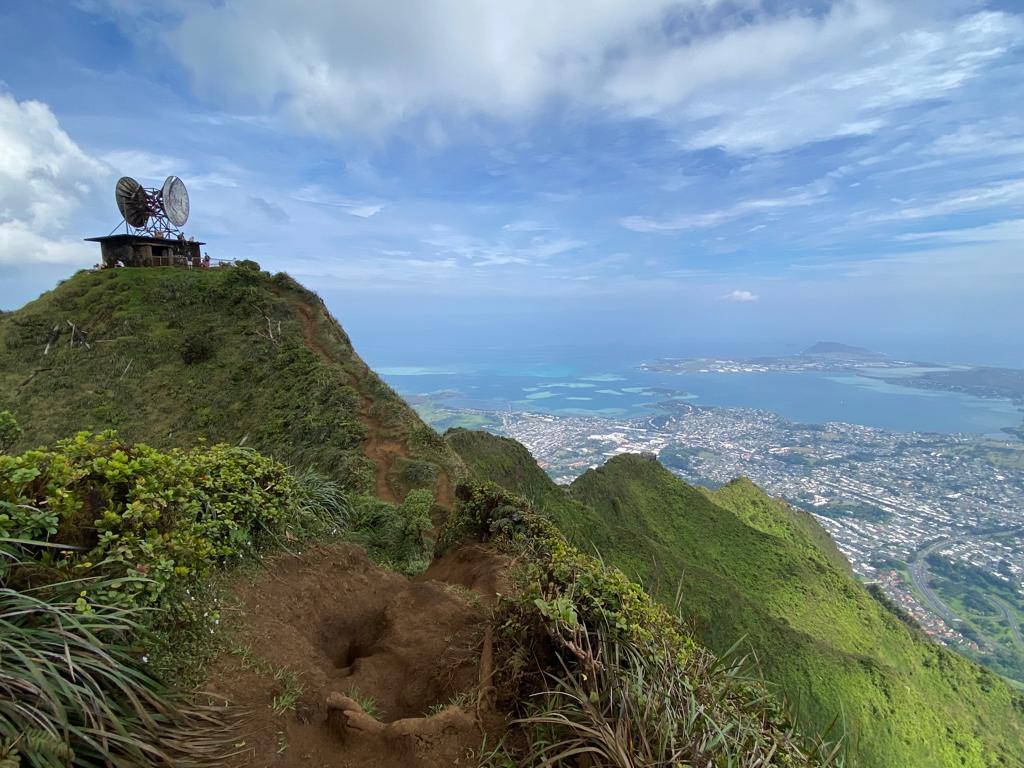
Moanalua Valley to Stairway to Heaven
Going up the Stairway to Heaven is a very iconic Oahu hiking activity. It is like a popular, forbidden fruit since it is also very illegal. I won’t be providing any information about getting this fruit. However, it is possible and legal to get to the point where the Stairway terminates at the top of the mountain. The Stairway ends at the abandoned shell of a US Navy facility that used to be part of the communication network used to communicate with Navy submarines all around the world. It is possible to get to this facility (and see the top of the Stairway) by taking a very long hike up the backside of the mountain.
This hike will be a challenge because of the length. It is safe and non-technical. There is one steep section of the trail with a long rope climb to get up, but it is straightforward and you can just power yourself up the rope and trail without much thought or skill. Make sure you are wearing comfortable footwear and that you have plenty of food and water to make it to the Stairway and back.
AllTrails Link: https://www.alltrails.com/trail/hawaii/oahu/moanalua-valley-trail-to-the-haiku-stairs-stairway-to-heaven–3

Mt. Ka’ala
Another hike to challenge your conditioning based on the length. Again, not a lot of danger or technical challenge. But the length and steepness will pose a challenge. This is the steepest mountain on the island with a height of over 4,000 feet. Bring plenty of water and lots of snacks for energy. It is fairly common for the top to be covered by clouds so when you get to the end of the hike, you may not even get a view of the surroundings. You know that your conditioning is pretty good if you can do this hike in the 5 to 7 hour range. The parking area is notorious for car break-ins. If you drive yourself and park your car at the trail’s start, DO NOT leave anything valuable/important in your car.
AllTrails Link: https://www.alltrails.com/trail/hawaii/oahu/mount-kaala-trail
Extreme Hiking
This is a class of hiking that I haven’t done and wouldn’t encourage anyone to attempt. This is only for the most experienced of hikers who have plenty of experience on Oahu and/or the mainland. Experience free climbing or using ropes is highly recommended. Remember, even very experienced hikers die on Oahu hikes every year. If vertical climbing crumbly rock over a sheer two thousand foot drop sounds like a good idea to you, then check out blogs like kenjisaito.com and look up trails like Nu’uanu Saddle or Kalihi Saddle. Good luck, let me know how it goes.
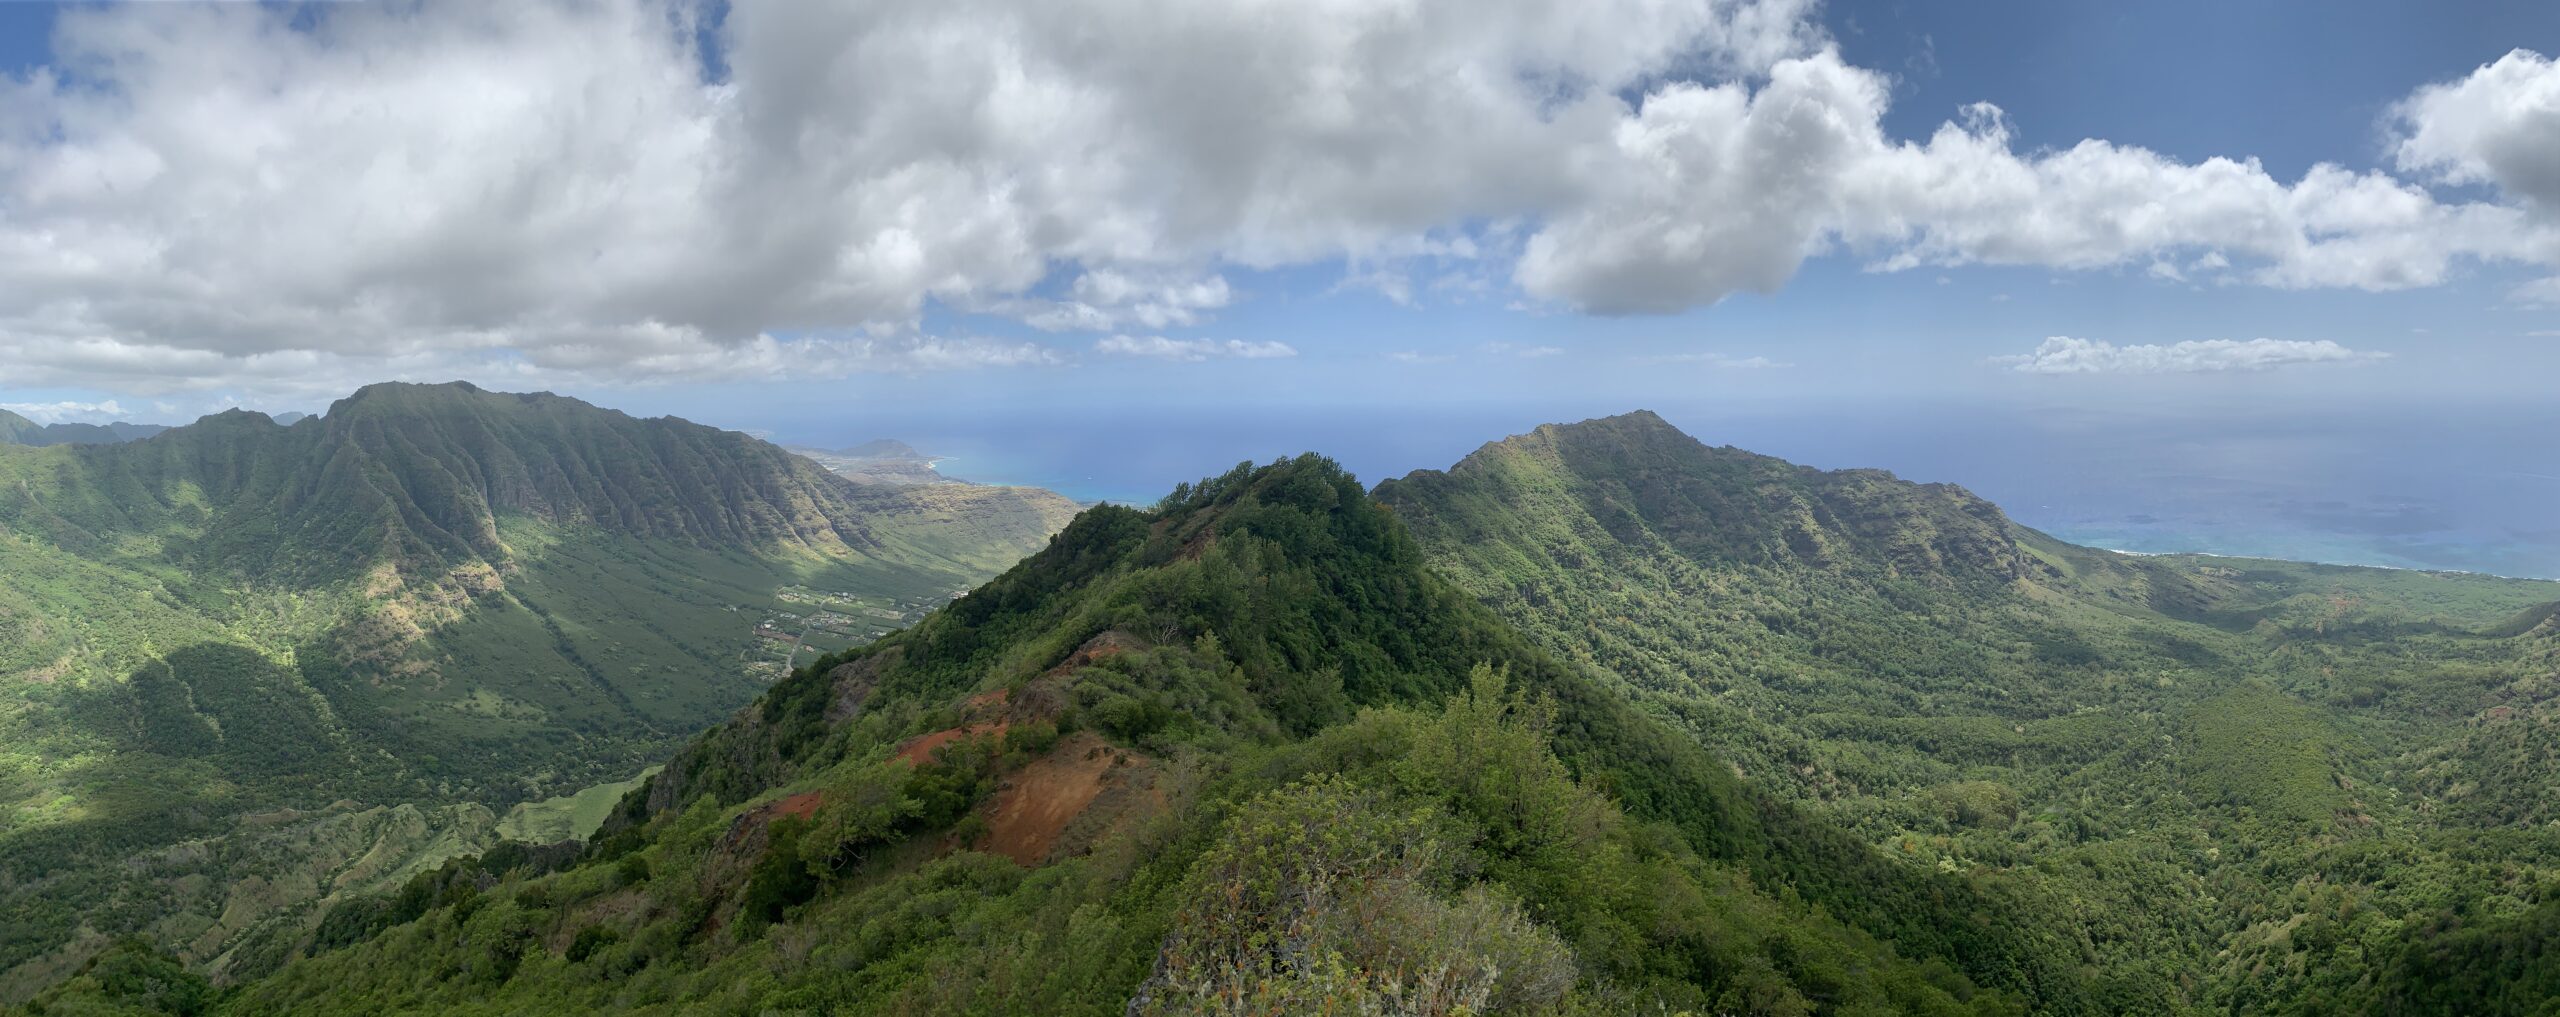
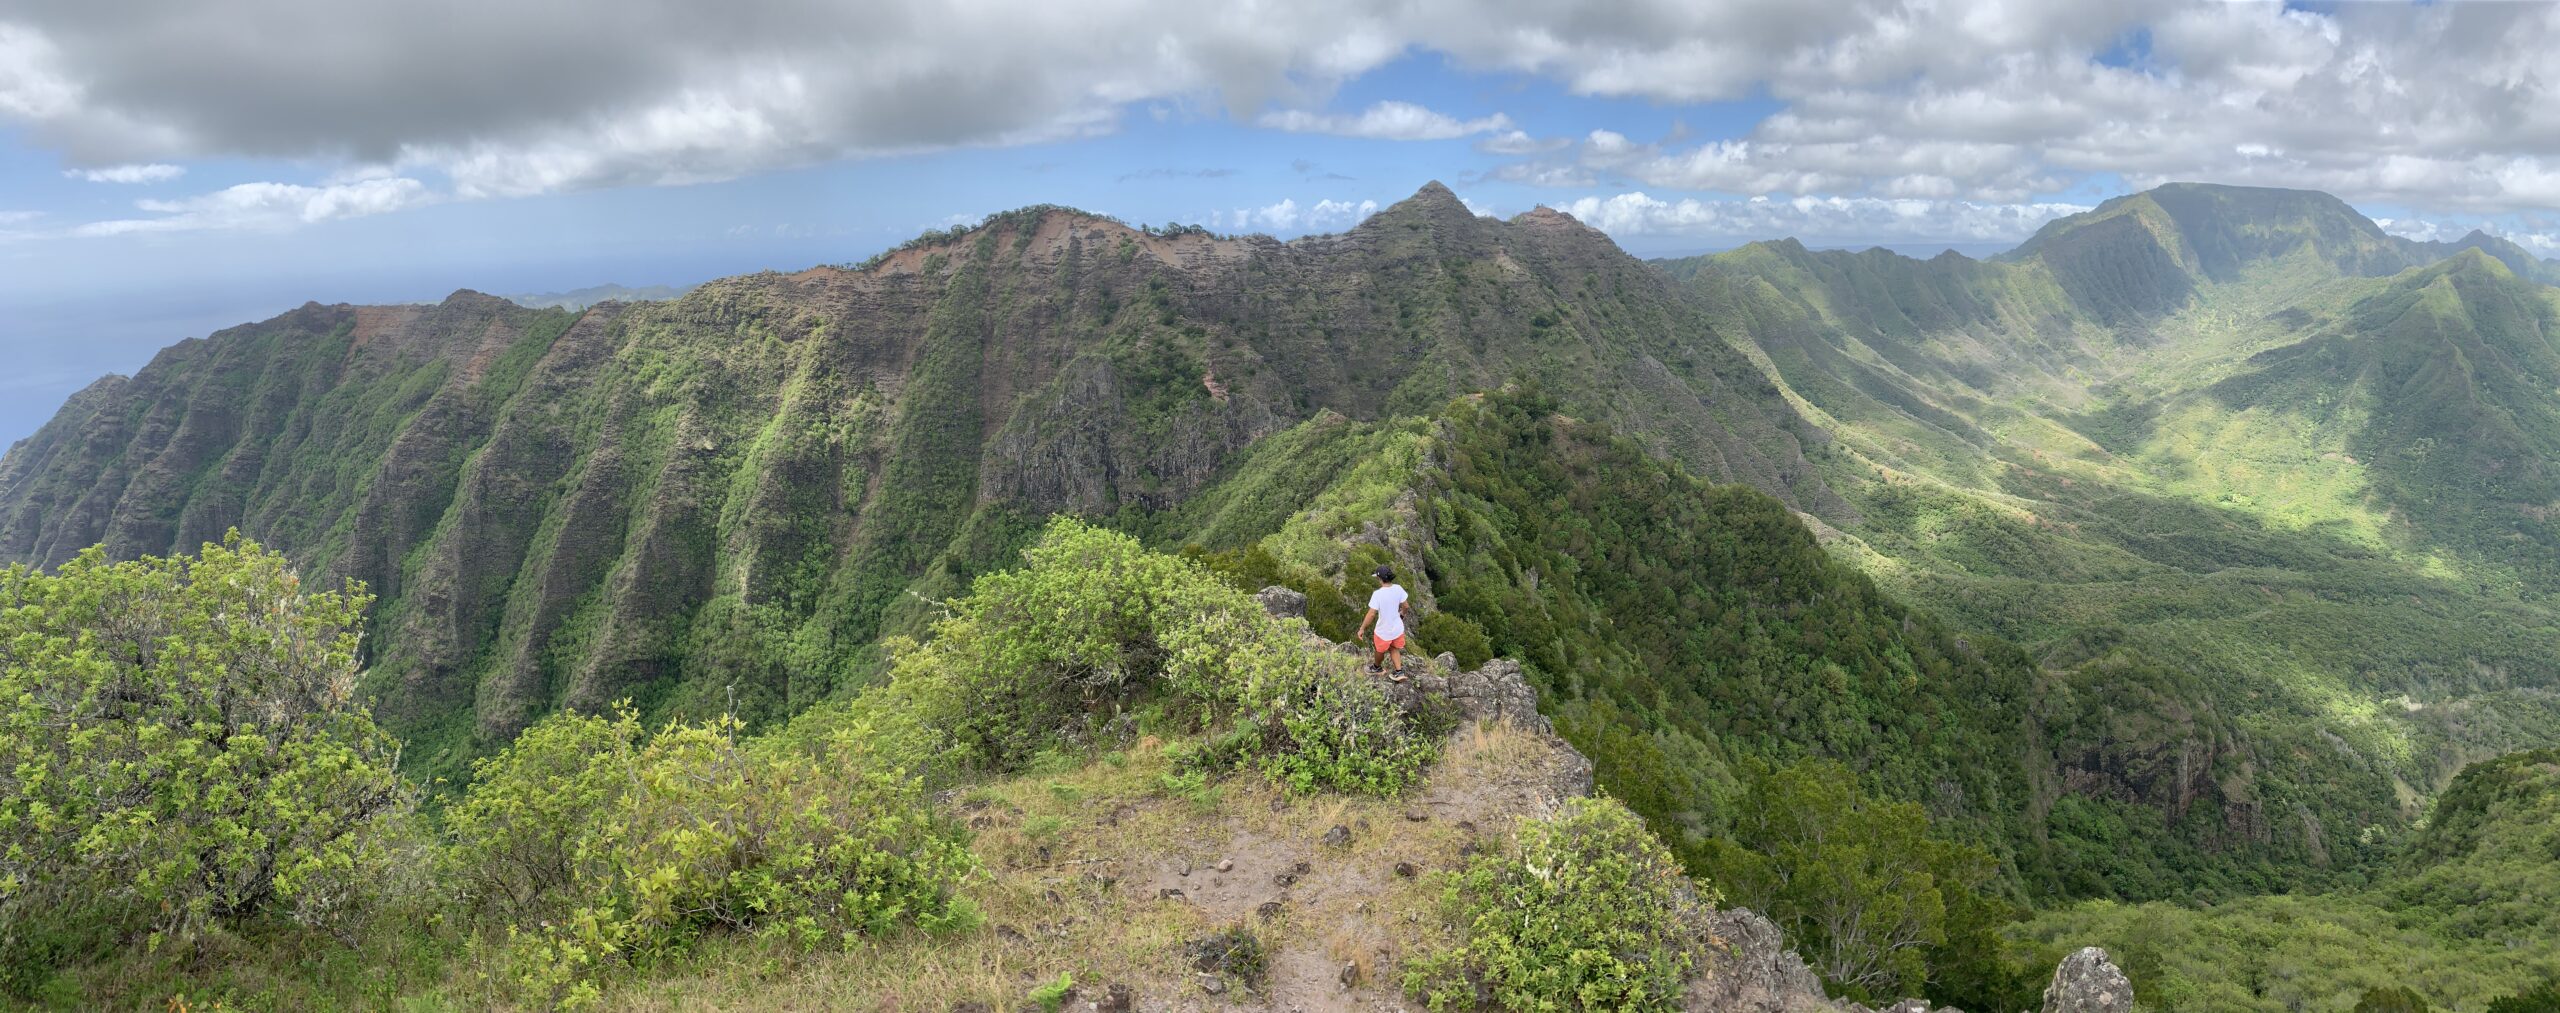
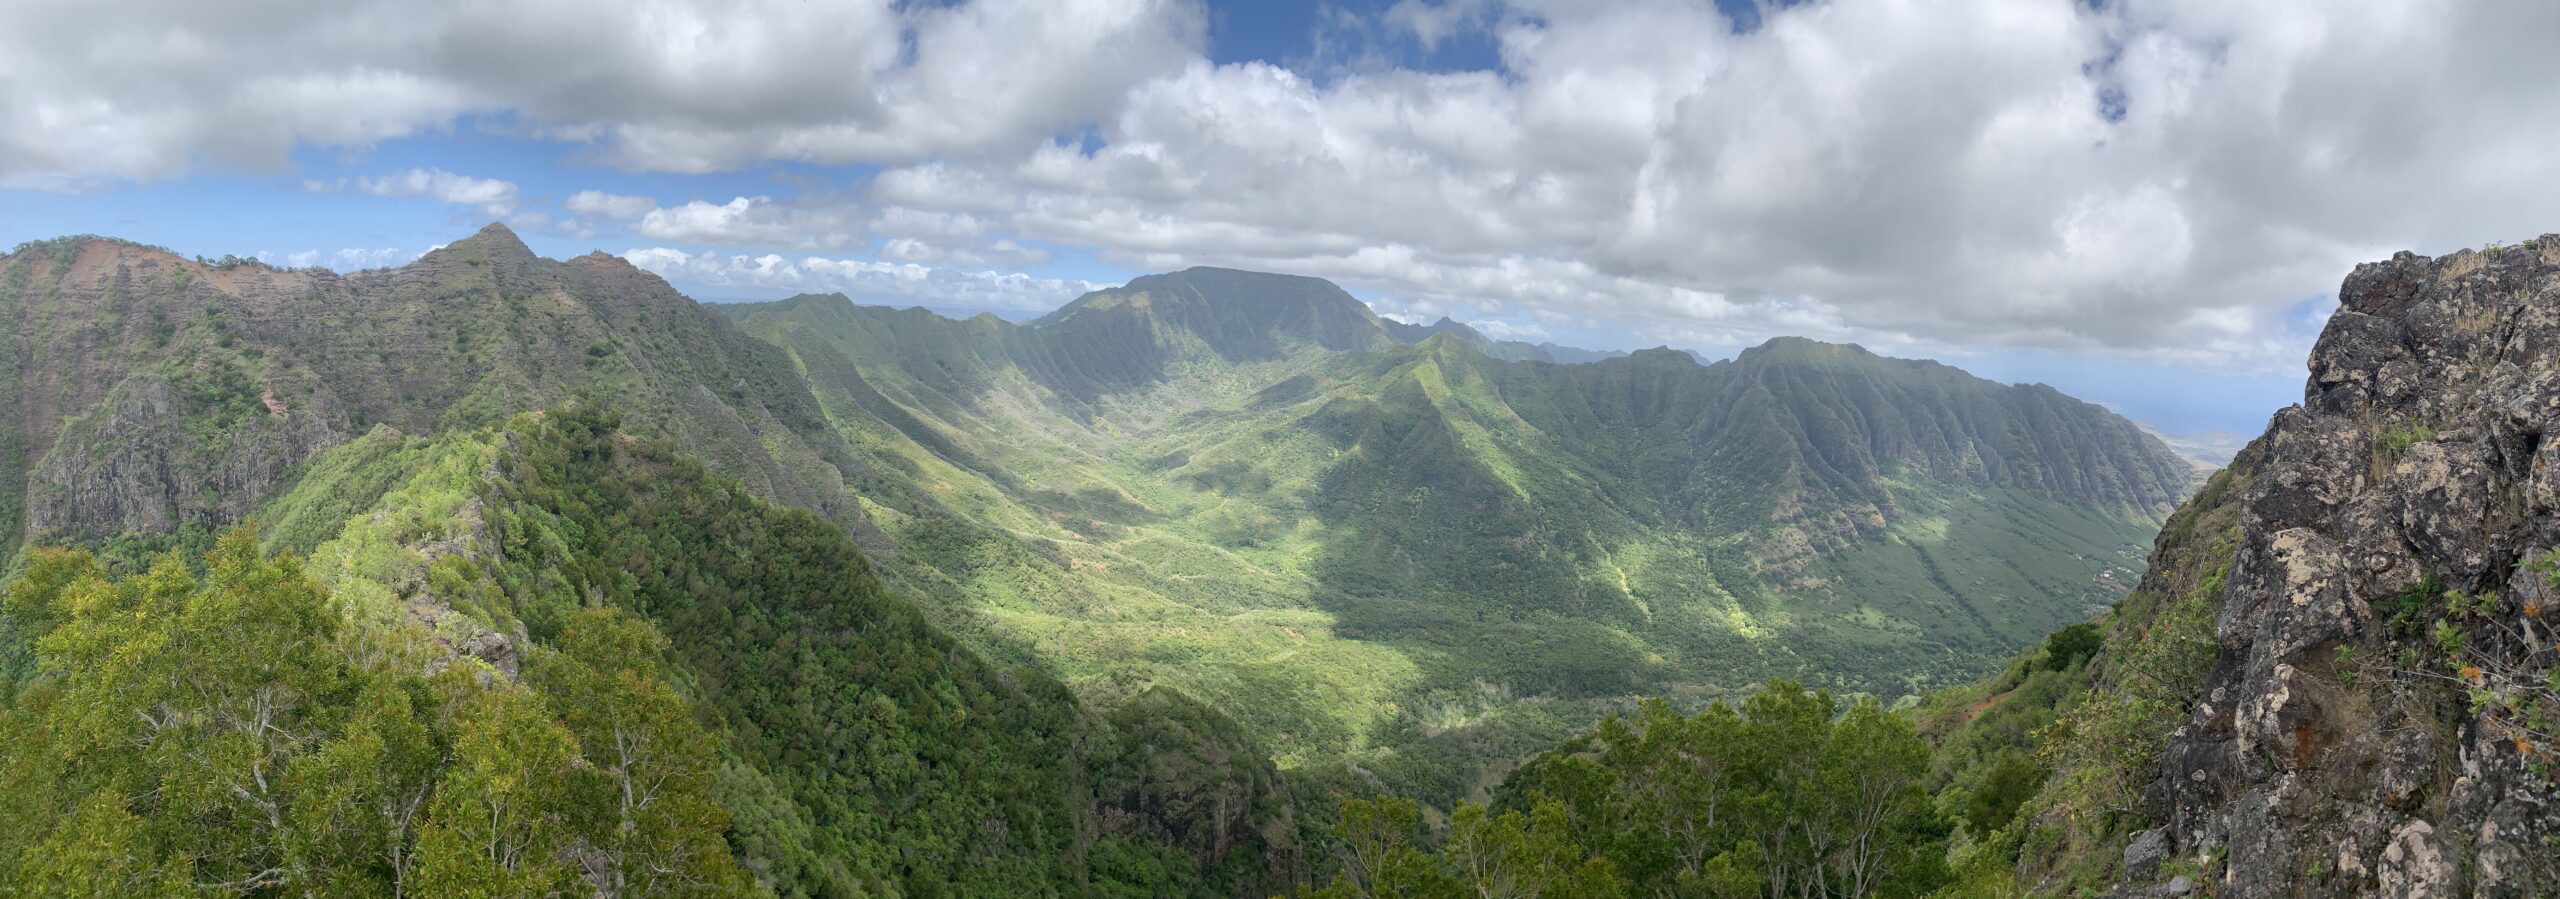
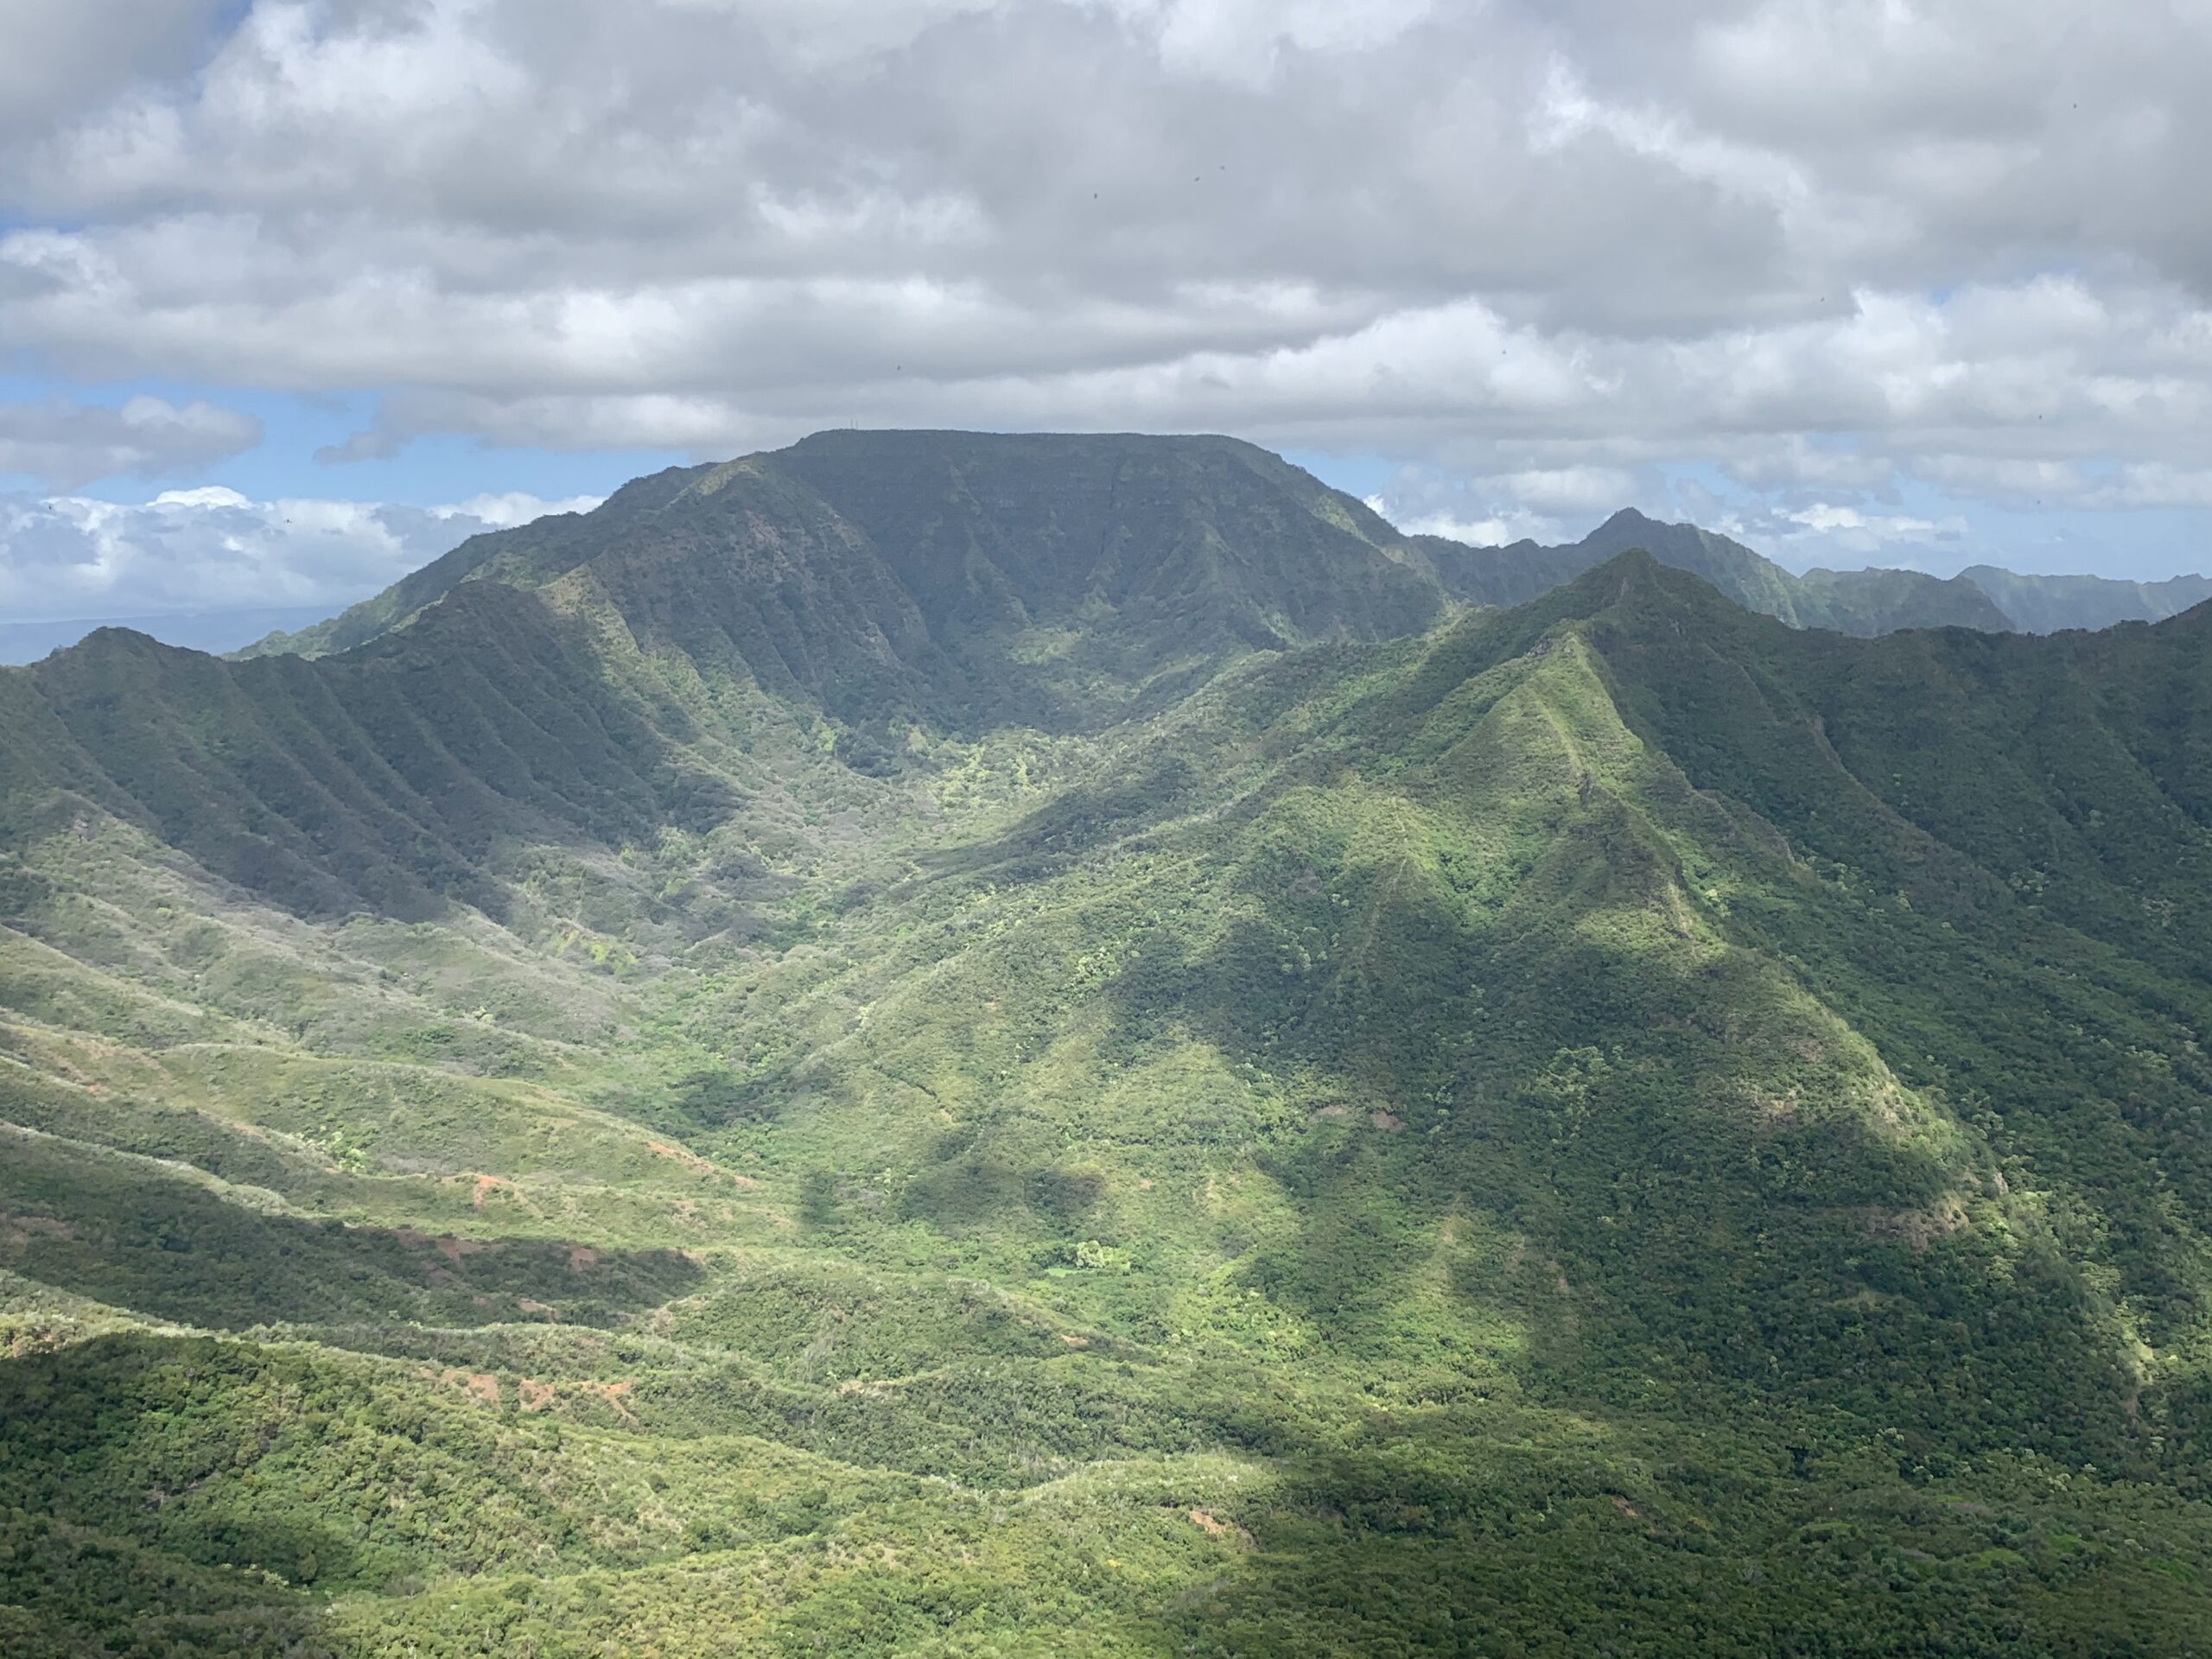
My Favorite Oahu Hike
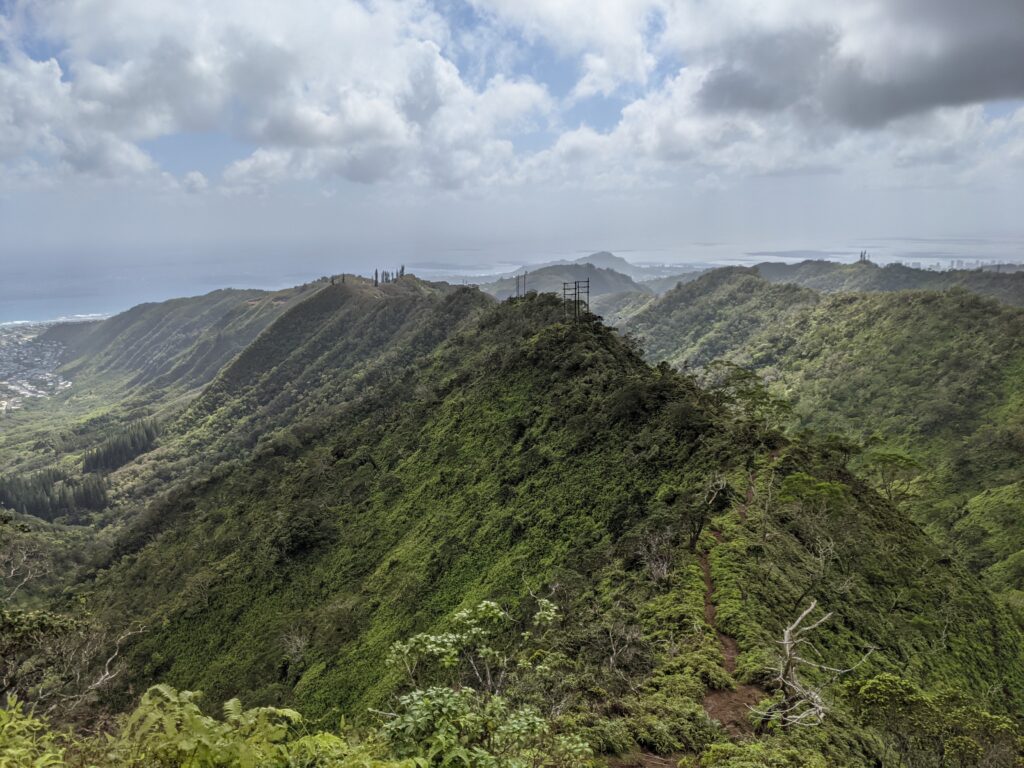
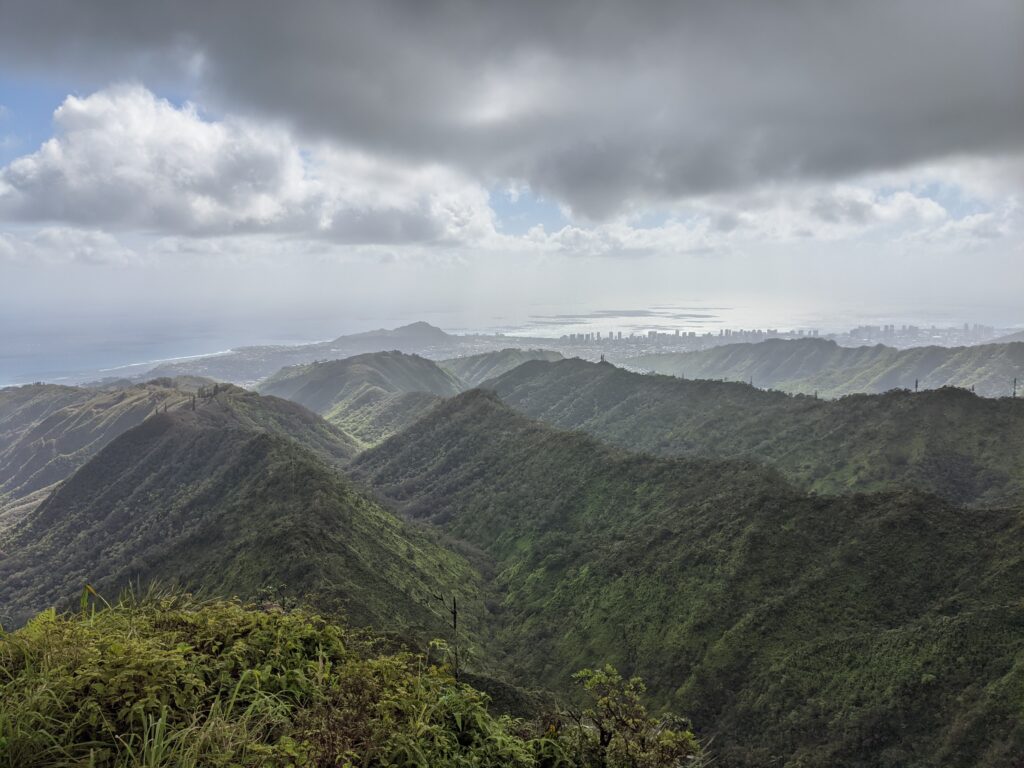
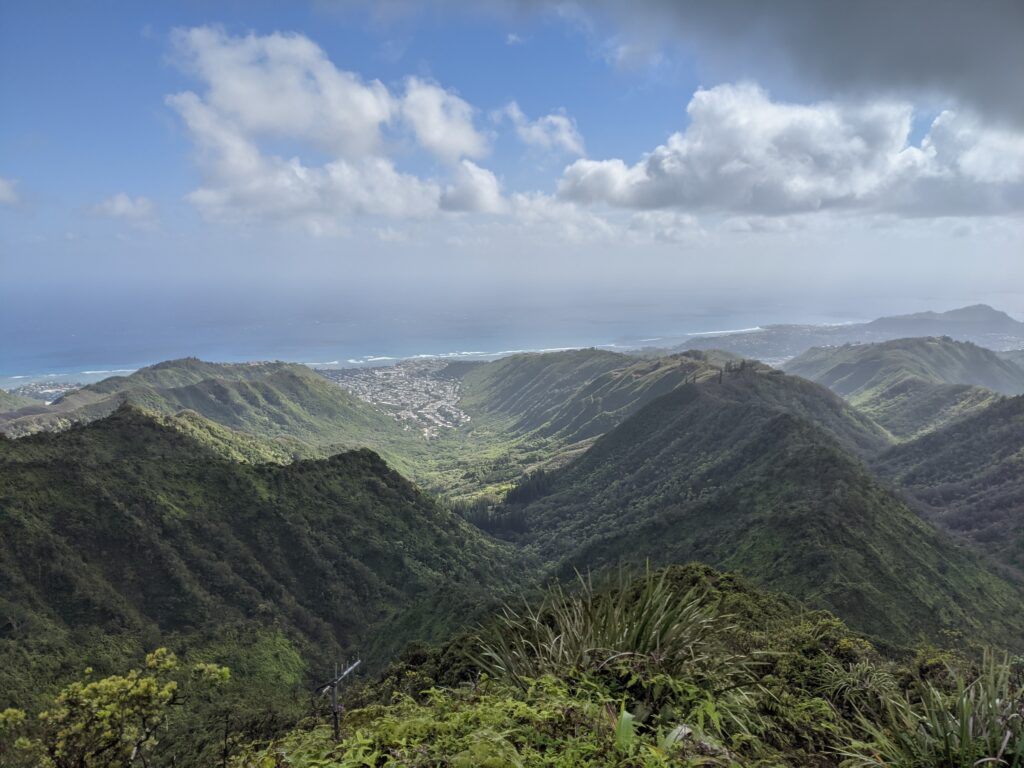
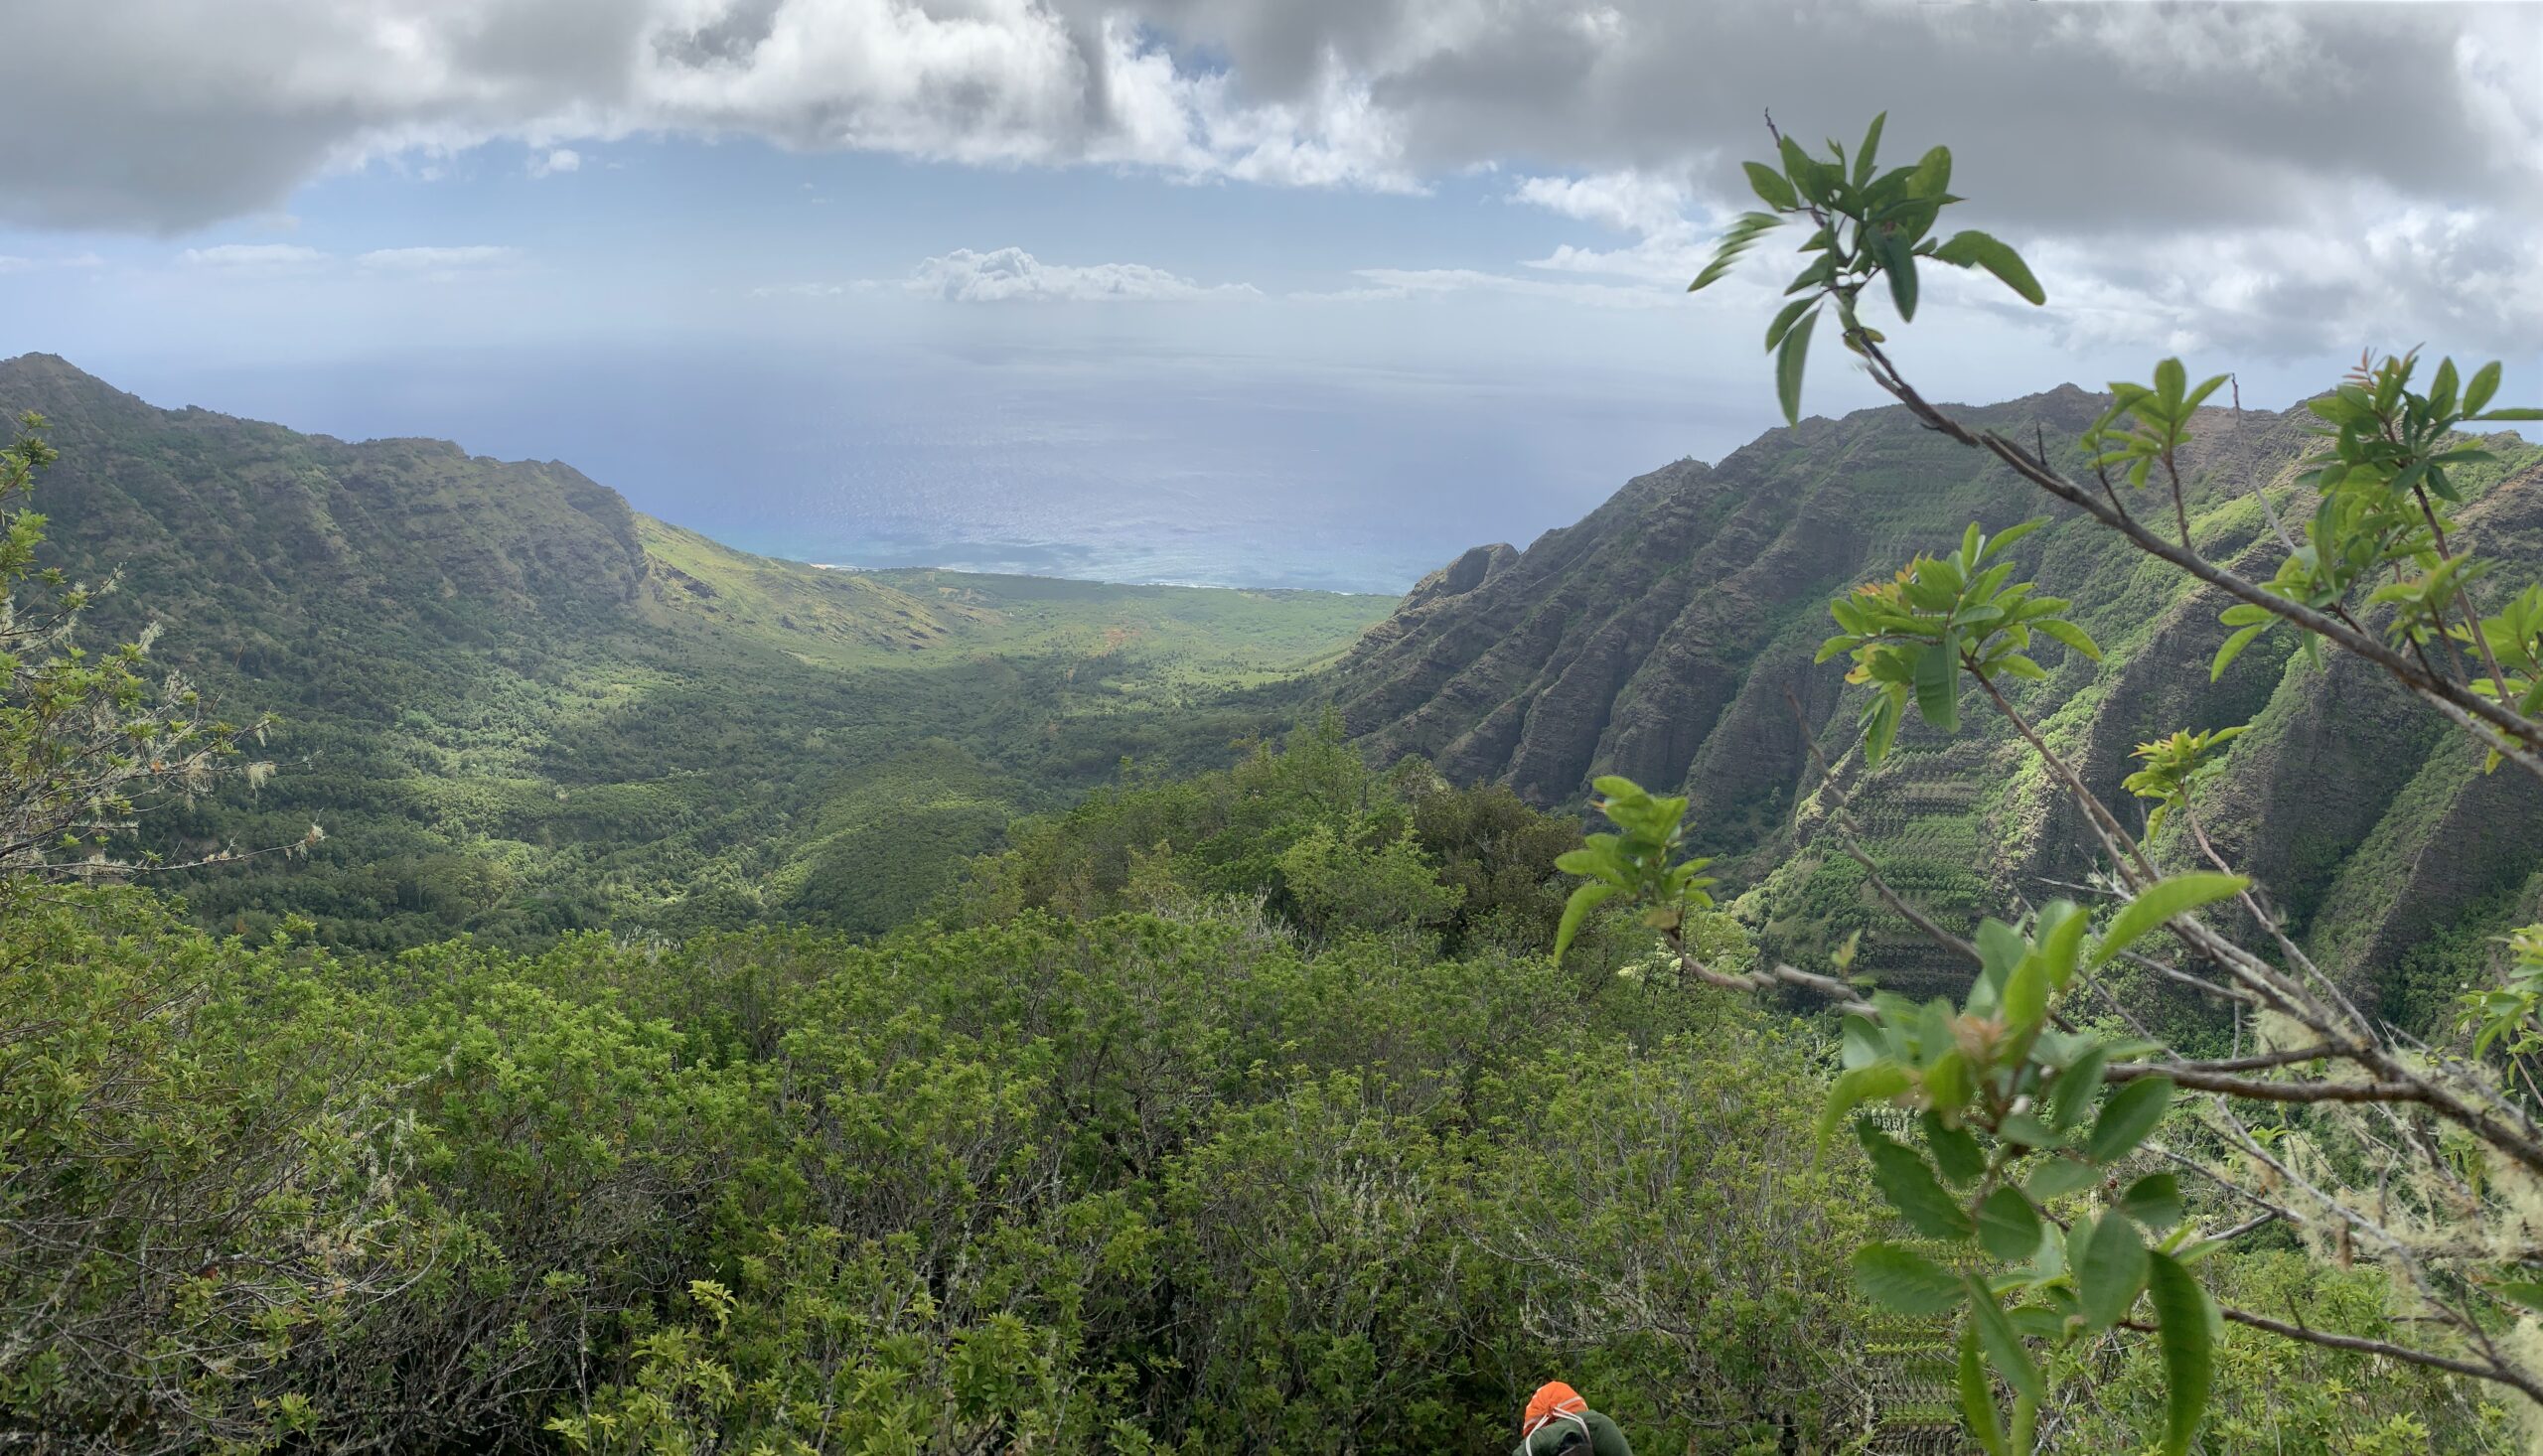
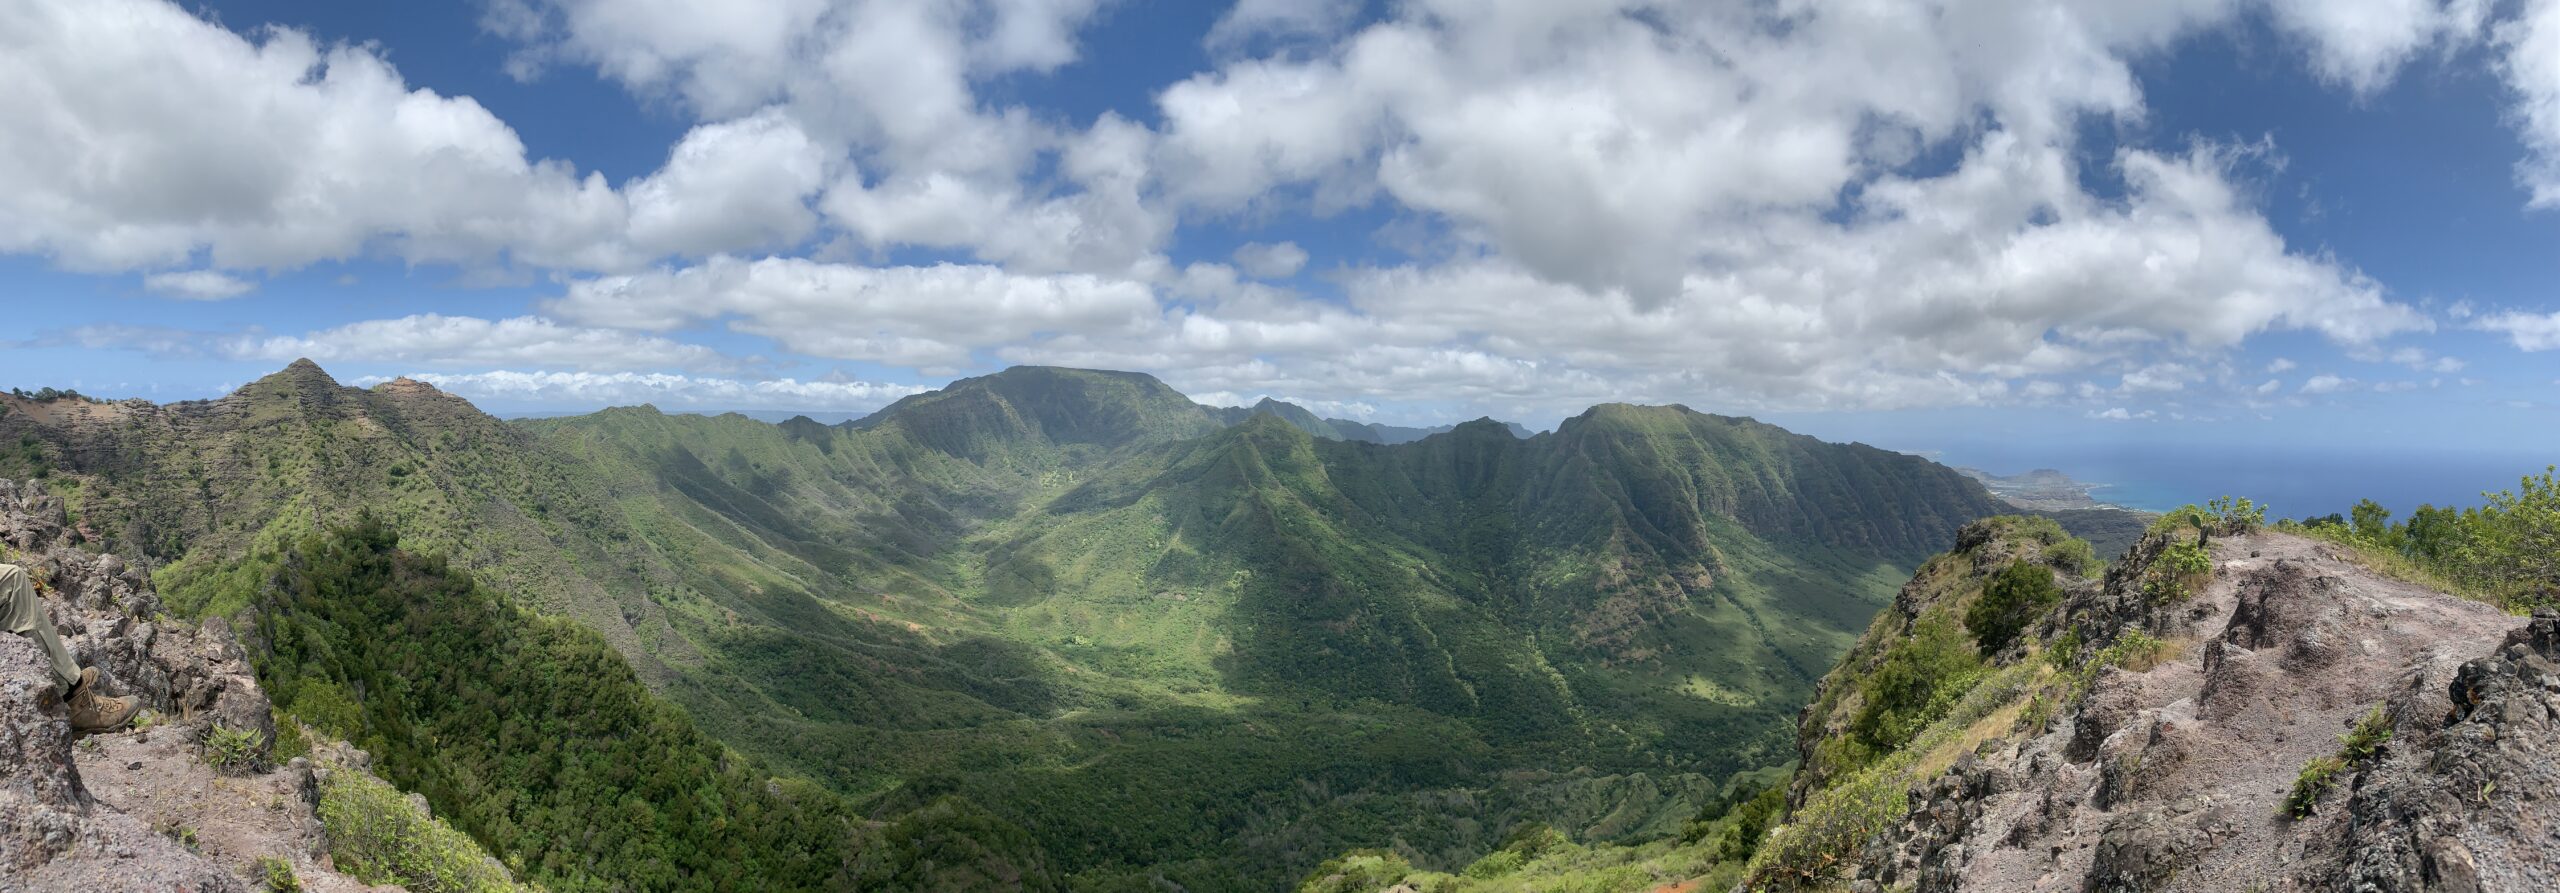
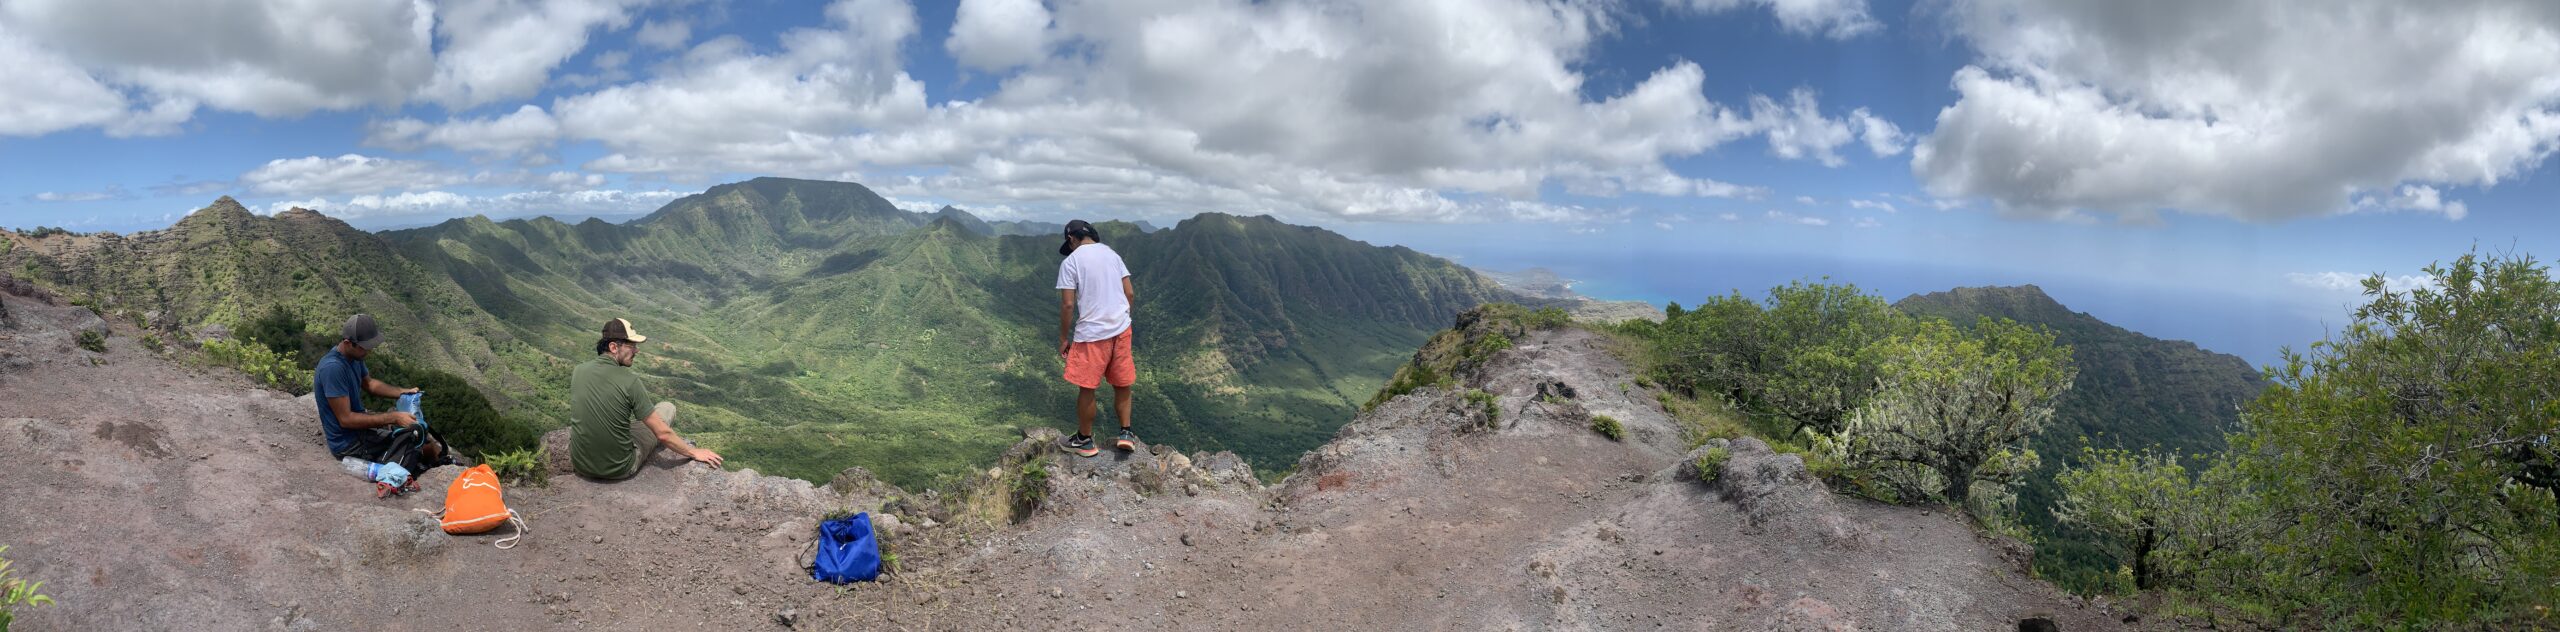
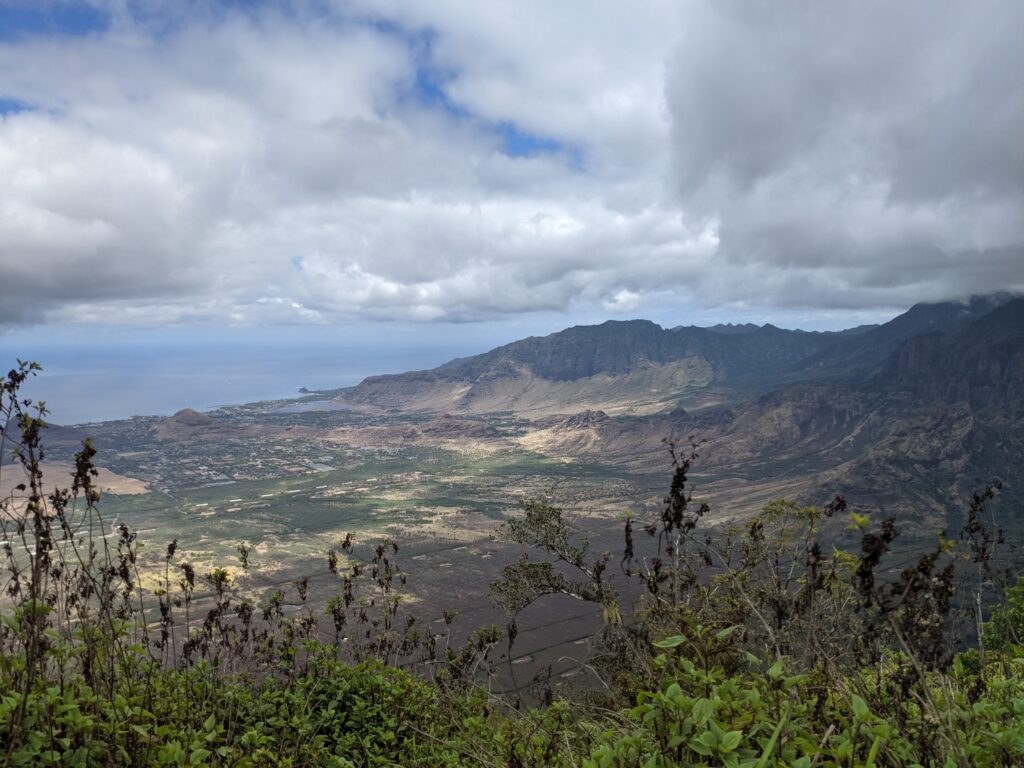
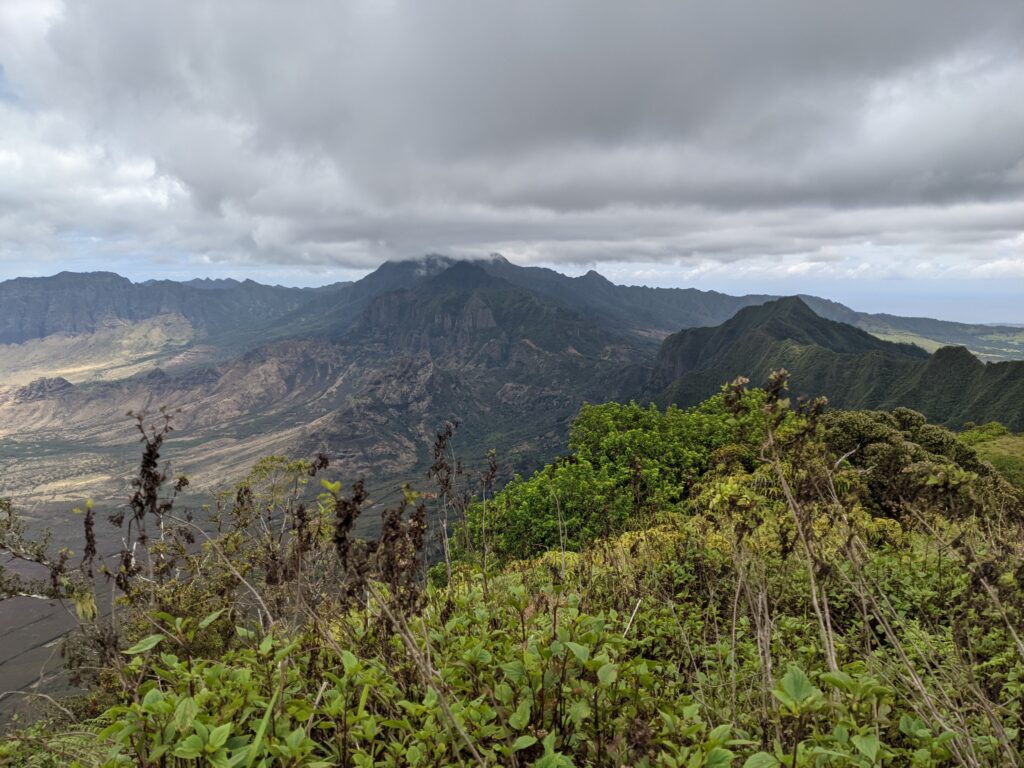
My overall favorite hike on Oahu is to Pu’u Kaua. This hike is on the “easier” side of an intermediate hike, but like any other hike on Oahu, there are some very important nuances. From the trailhead, this hike is pretty flat for a long time. It starts off going through a beautiful forest. This provides lots of shade and there are trees growing coffee beans and many guava trees close to the trailhead. My buddy and I easily got two backpacks full of guavas on our way back from these guava trees. The forest can get a bit tricky since there are many hunting trails and you could get significantly lost if you don’t have something like a GPS or AllTrails to help you navigate on the right path. The flat forest path will eventually take you to where the ridge starts to take you to the mountain peak. The ridge is straightforward; it is not very steep, you do not need to use ropes to climb, and there are no dangerous areas with steep drop-offs.
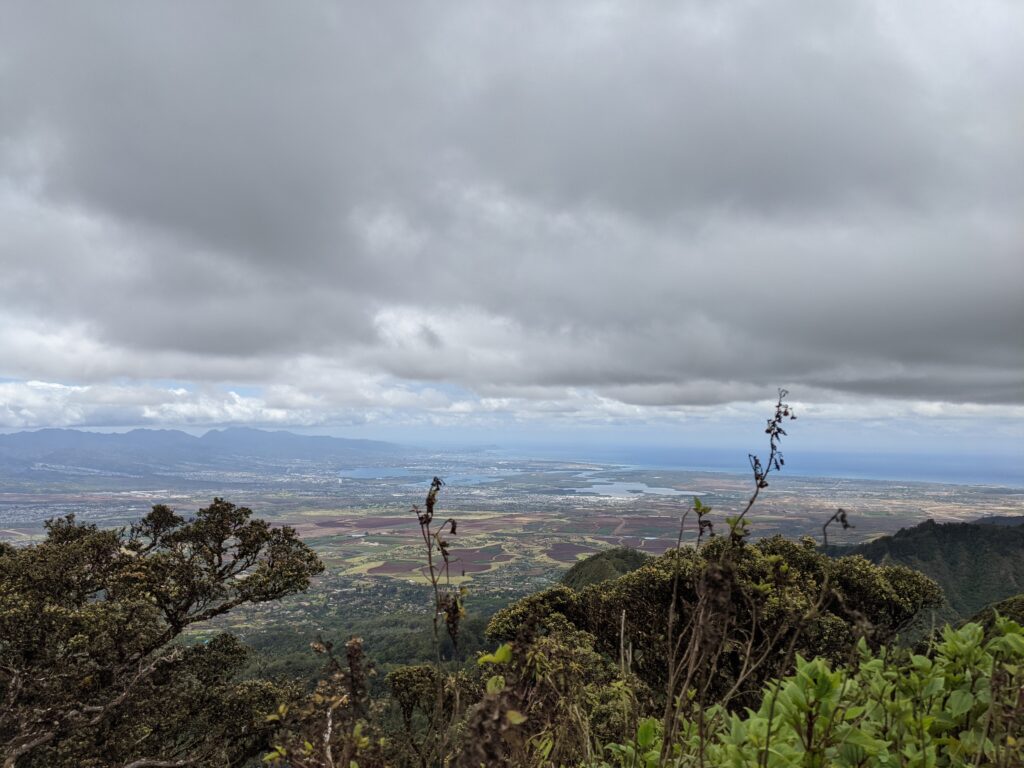
When you get to the top of the peak, the views are incredible. This is either the 3rd or 4th tallest peak on Oahu, so it is possible to see quite a bit if the clouds cooperate. To the west, you get a beautiful view towards the ocean down the entire Waianae Valley. On one side of the valley, you can see down the whole westward ridge of the WST (Waianae Summit Trail system of mountains). On the other side of the valley, you can see the WST system going to Mt. Ka’ala and branching off beyond that. The entirety of Central Oahu is visible looking eastwards. The ocean from the southern part of the island is visible and the ocean along the North Shore is visible. The KST system of mountains is visible on the other side of Central Oahu looking eastwards and Honolulu is visible in the distance. It really is spectacular to see all of these regions from one place. The kicker is that to get to this peak to get these spectacular views, the effort is far less (with almost no danger) than many other less rewarding hikes.
Now, about those important nuances. The primary factor here is that the trailhead is in some guy’s backyard and going through his property is the only way to access the trailhead. I don’t know how this situation came to be. Maybe the trailhead was always blocked by his property and he has some kind of access agreement to let hikers go through his property to get to the trailhead. Maybe at one point, he expanded his property to block the trailhead. Whatever the case may be, it makes access not straightforward. His backyard is not well kept and he has a chained pit bull (pit bulls maybe). When I went on this hike, I tried going around through the tall grass on the northeastern side of the property, but you end up going through his vegetable garden instead of his backyard to get to the trailhead, which is not much better. I cannot advise on the best way to start this hike since I don’t have a good solution. If anyone knows of a good way to get access, let me know!
The other nuance is that the property with the trailhead is in a private agricultural area. Access is restricted and you need to use a locked gate to both enter and leave the agricultural community. You can read online accounts of people who have done this hike by avoiding the access issue altogether. They’ve parked their cars along Kunia Road and walked 3 miles through the fields of the agricultural area to reach the trailhead. This adds 6 total miles to the hike and makes it twice as long as it would be otherwise. Not an ideal solution.
AllTrails Link: https://www.alltrails.com/trail/hawaii/oahu/puu-kaua-trail
There is another way to get to the peak if you want those amazing views, but it becomes a completely different hike. It is possible to get on the western ridge of the WST going to the peak and hike along that ridge to the peak. Getting access to that ridge can probably be done somehow in Nanakuli or Makakilo. If anyone has done this, I would love to hear about it!